CrashPanel Scripting Guide: A Beginner's Guide to Node-Based Scripting
Introduction
This guide will walk you through the basics of creating and understanding scripts in CrashPanel. CrashPanel uses a node-based system, which means you connect different nodes (or blocks) together to create your scripts.
Understanding the Script Editor
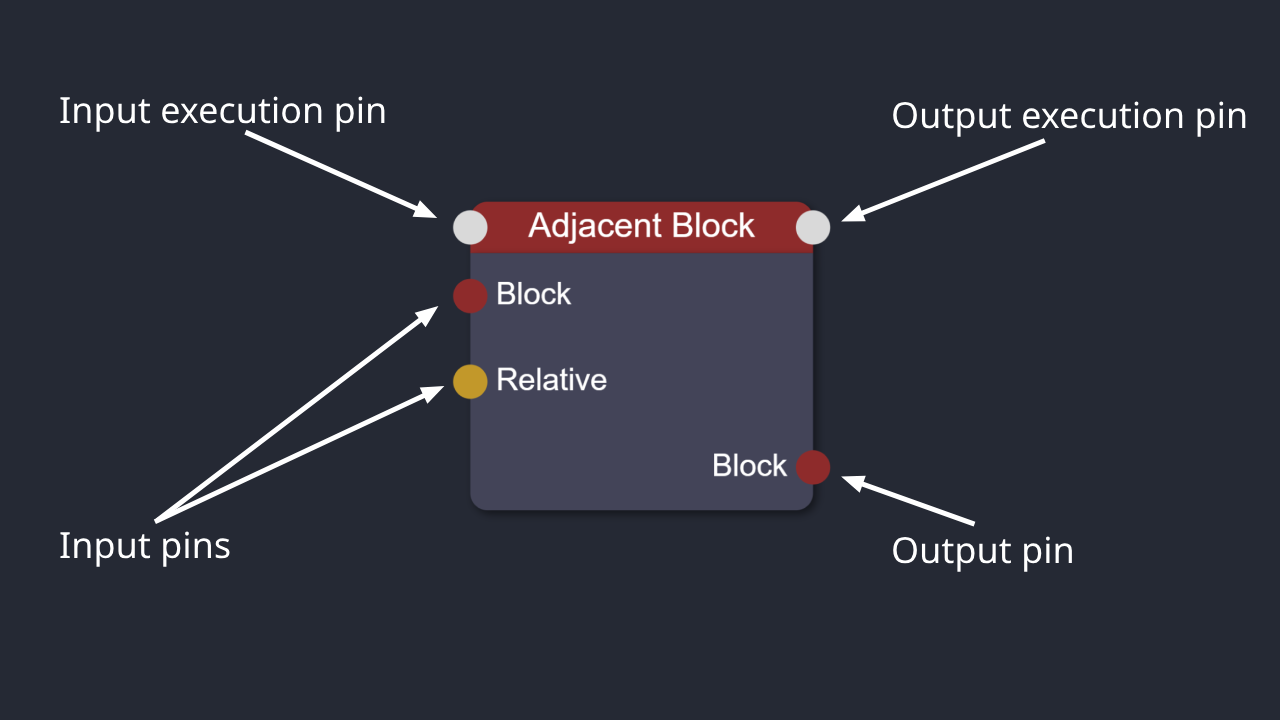
- Nodes: These are the building blocks of your scripts. Each node performs a specific action, like getting a player's name or waiting for a certain amount of time.
- Pins: These are the connections between nodes. Input pins receive data, while output pins send data.
- Execution: Nodes are executed based on the connections between them. The execution pin determines the order in which nodes run.
Adding and Removing Nodes
- To add a node, click the "NODES" button in the upper right corner (or press "a" on your keyboard) to open the node panel.
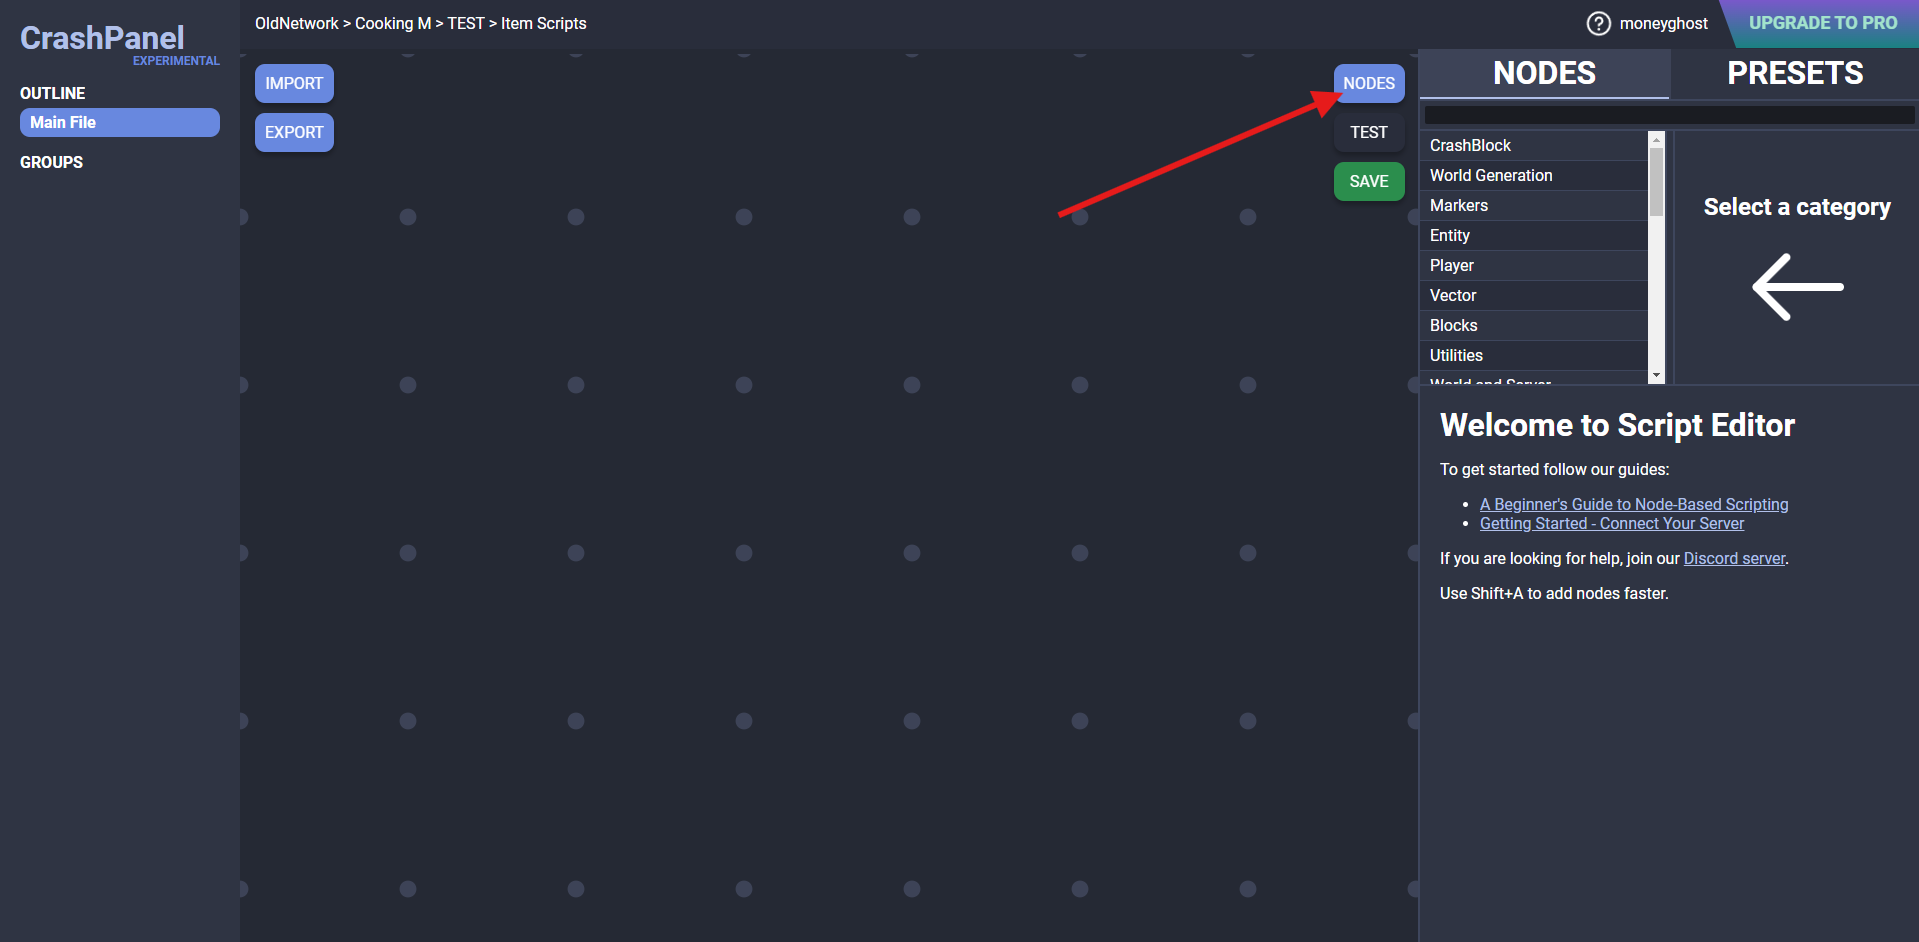
- For example, to add a node that pushes an entity, we can search for it among the nodes in the Entity category, or search for it with the search bar.

- To add nodes faster you can use the shortcut "Shift + a", which will open a small panel similar to the previous one, but faster and less detailed.
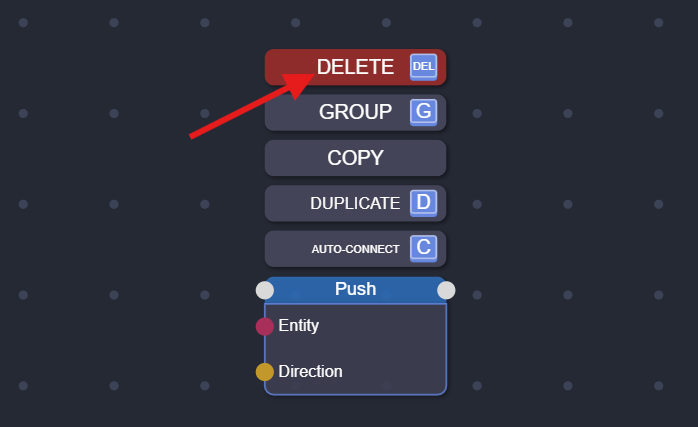
- To remove a node right-click the node and then click "DELETE". You can delete multiple nodes at a time by selecting them with "Shift + left click".
Input Nodes
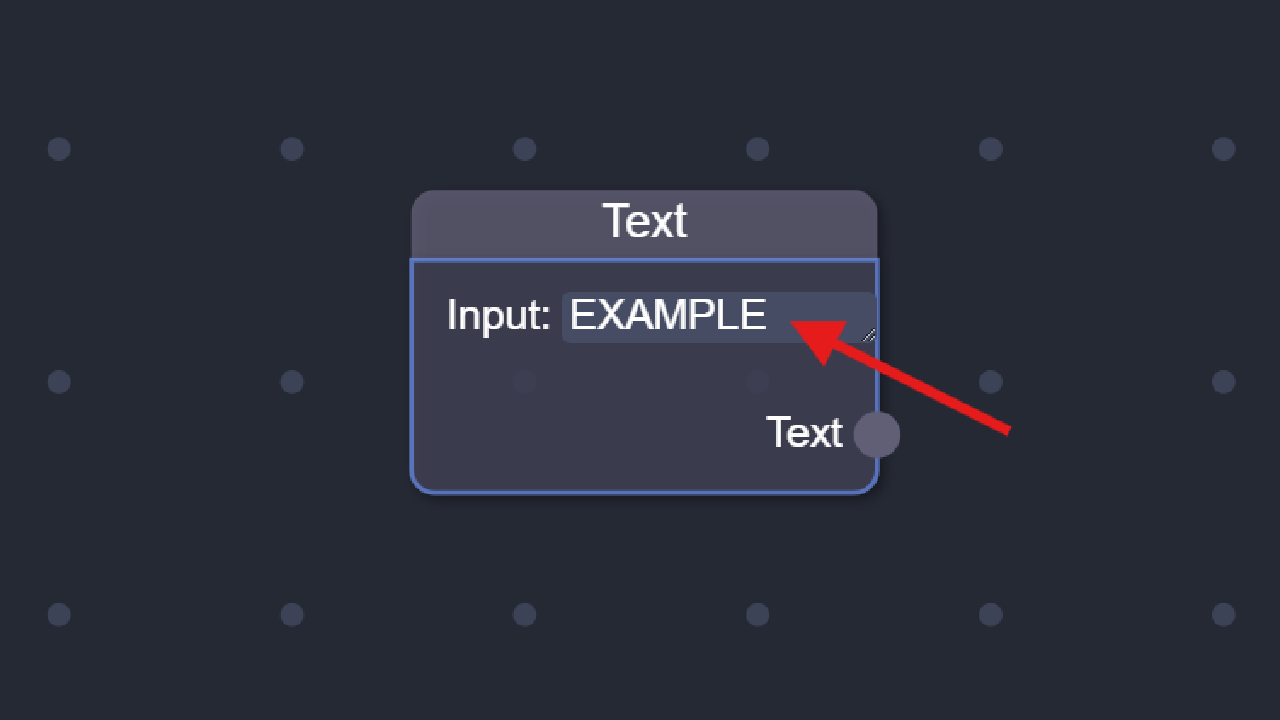
Some nodes need user input. For example, the "Text" node needs text input. To enter the input, right-click the node and click "EDIT".
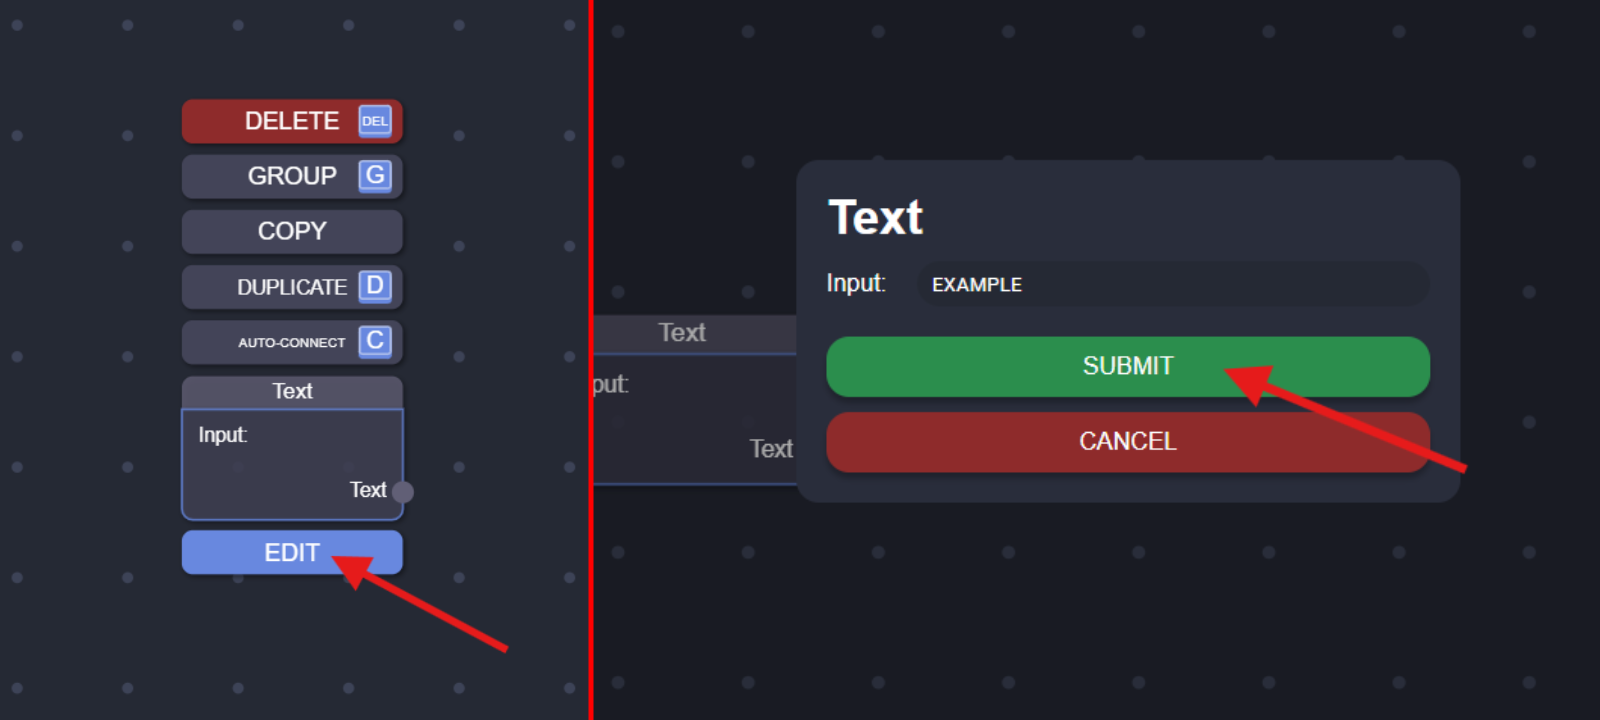
Alternatively, you can double-click the desired field and enter it directly.
Connecting the pins
To connect the pins hold down one pin and drag the "wire" to the other pin.

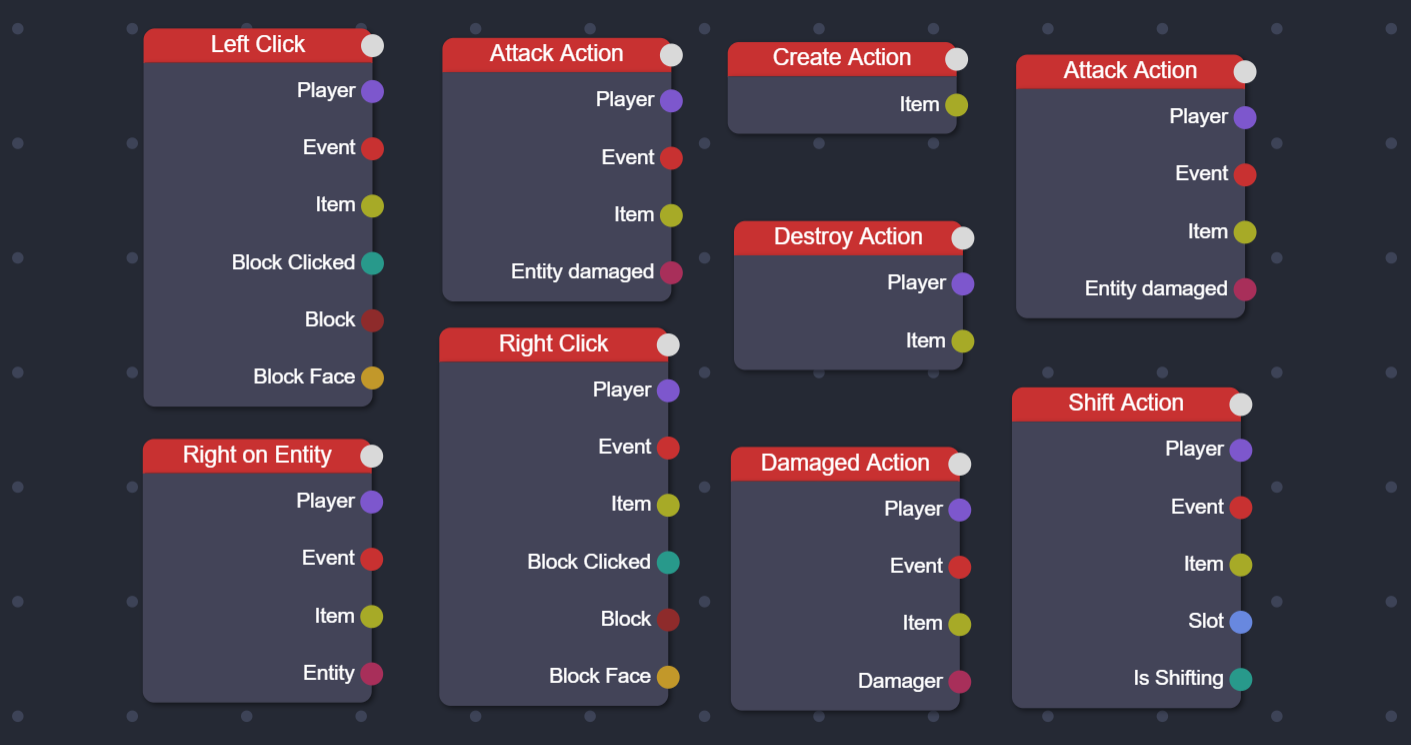
Listeners
Listeners are special nodes that "listen" for specific events, like a player right-clicking an item or a command being executed. When the event happens, all the nodes connected to the listener will run.
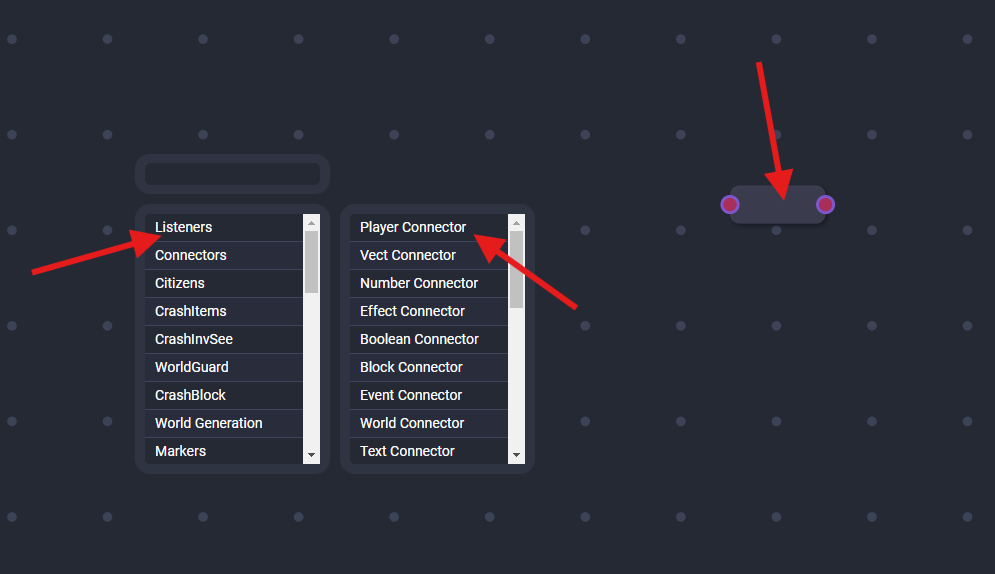
Connectors
To keep the script clean, it is recommended to use "Connectors". These are only accessible from the "Fast Nodes Menu" by doing "Shift+A".
Grouping Nodes
See the guide dedicated to groups.
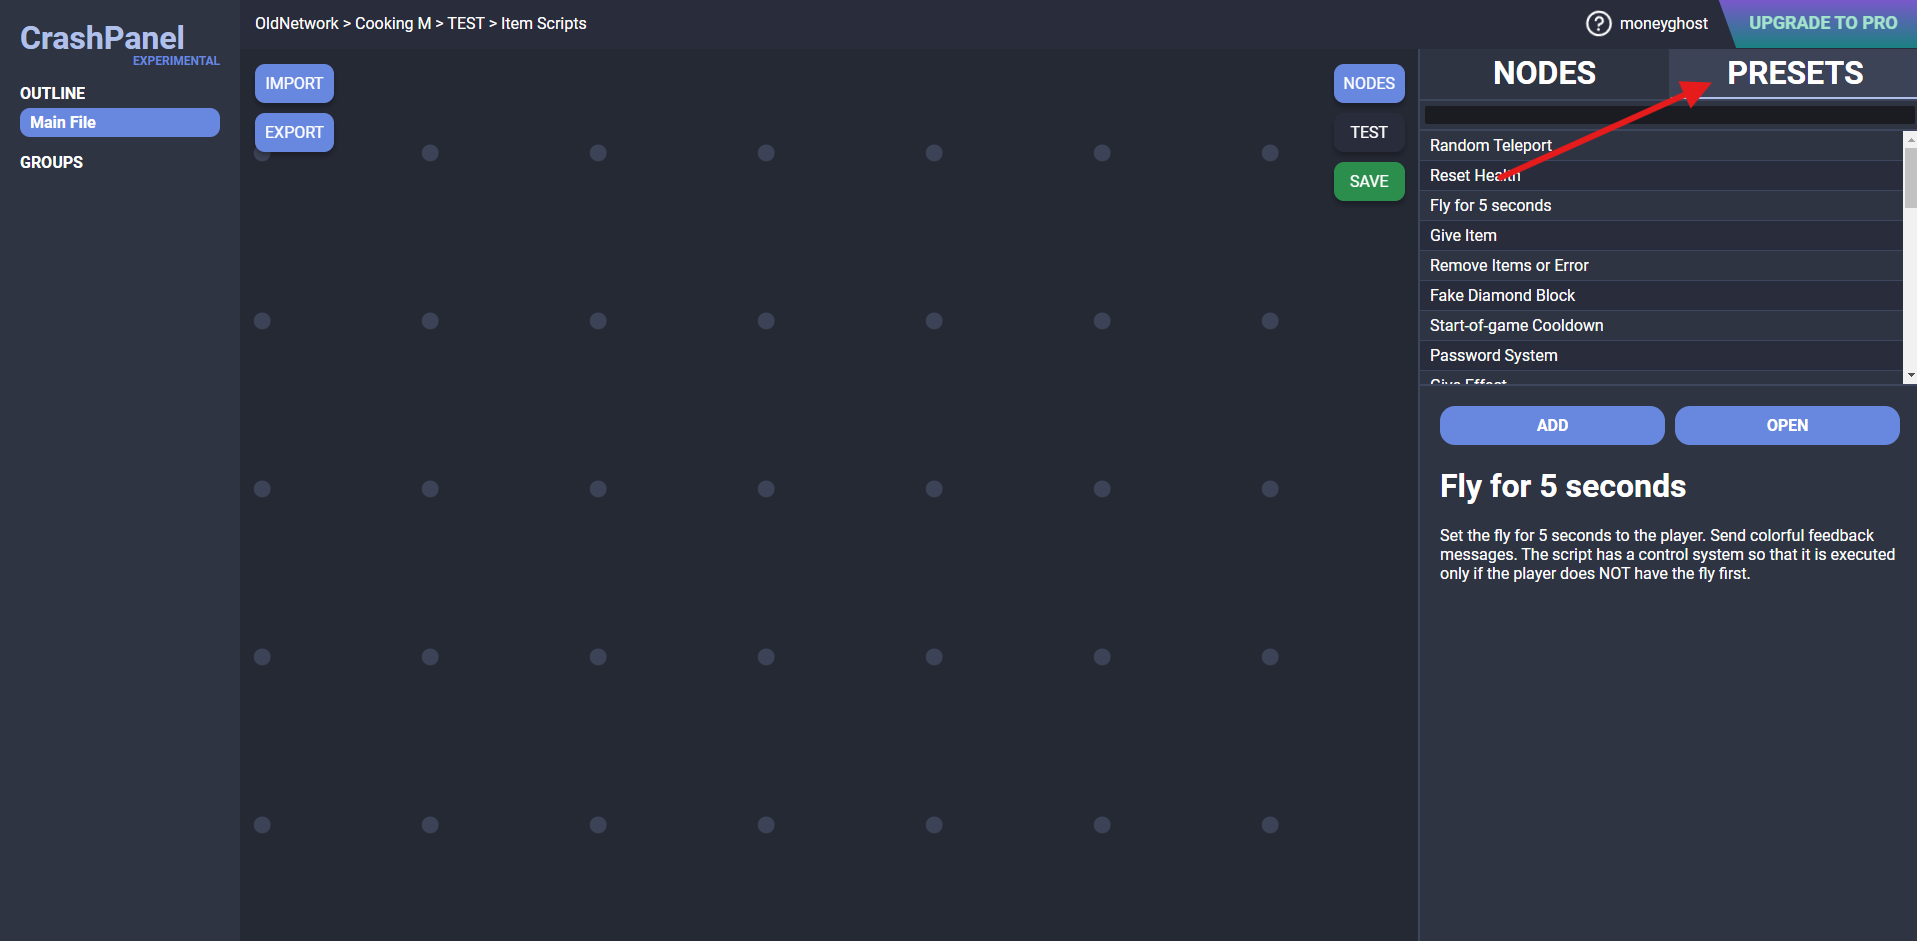
Presets
In the "NODES" panel on the right you can also access the "PRESETS" panel. At the beginning it is recommended to try and analyze these presets because they can give interesting insights (note that some are very complex, and it is normal not to understand them).
Creating Your First Script
To create a SCRIPT we must first know WHAT to create this script for. Here you will see examples made for CrashItems Custom Items but first you need to know how to create a Custom Item (see the dedicated guide). If you do not have CrashItems or do not want to start with Custom Items you can look at our dedicated guide for Custom Listeners.
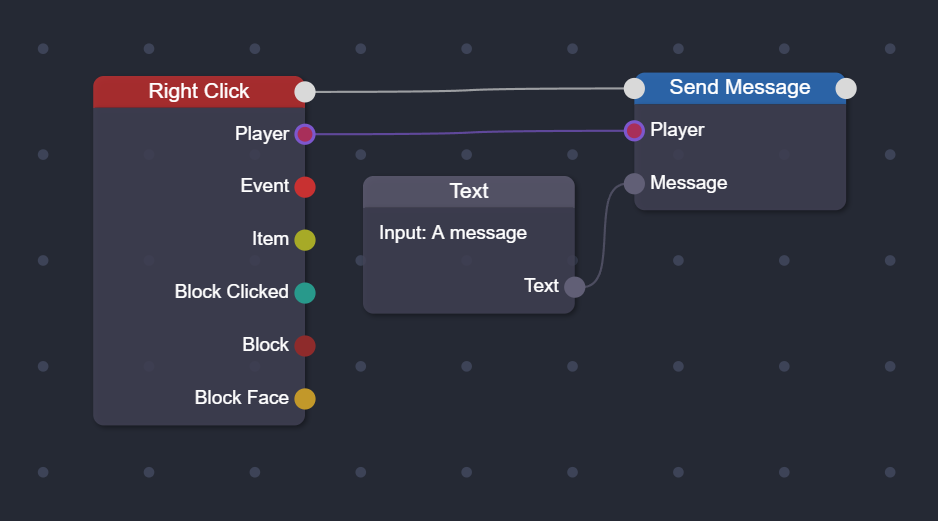
Let's create a simple script for a custom item. When a player right-clicks with this item, they will receive a message.
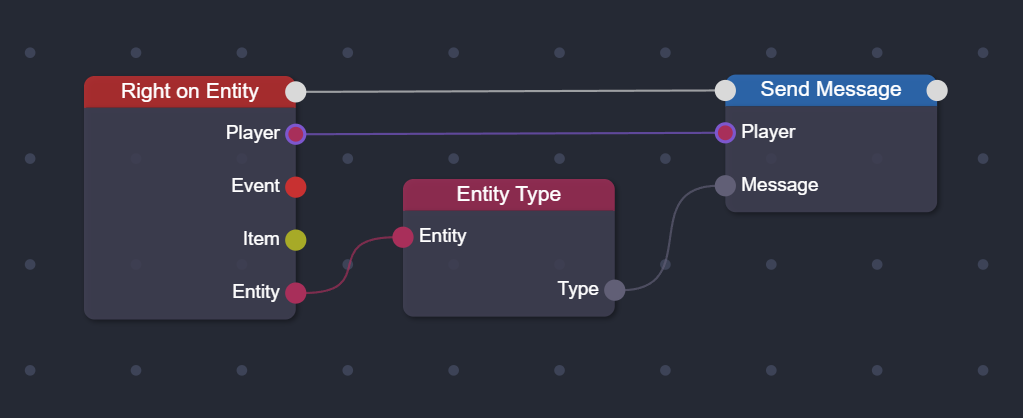
Here is another example. When a player interacts with this item on an entity, it receives the entity type as a message.
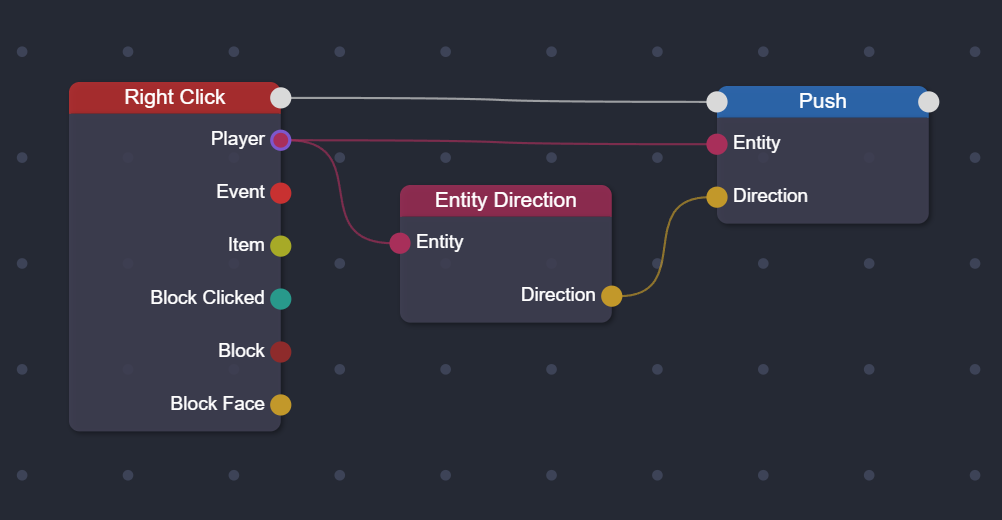
Here is a more complex example. When a player right-clicks with this item, it is launched where he is seeing.
Special Nodes and Their Use
Many nodes work differently from "normal" nodes, and many of them are the "Utilities" nodes. In this guide we will quickly look at only 2 nodes:
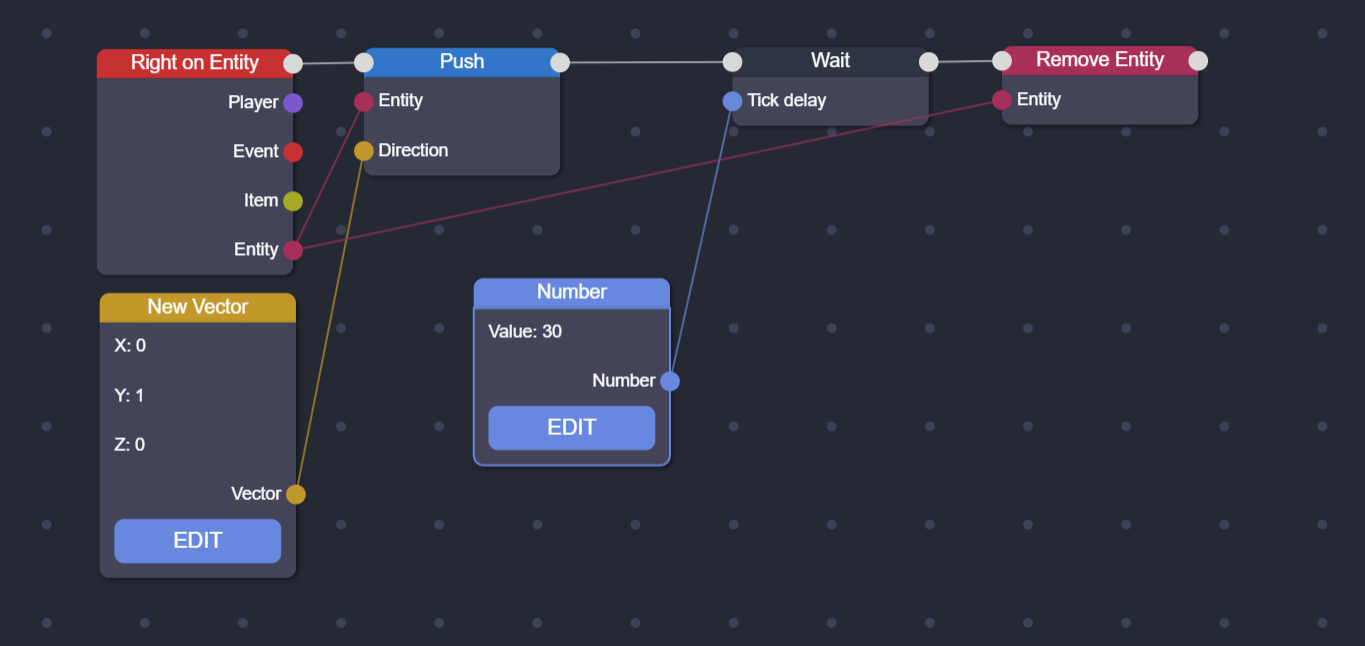
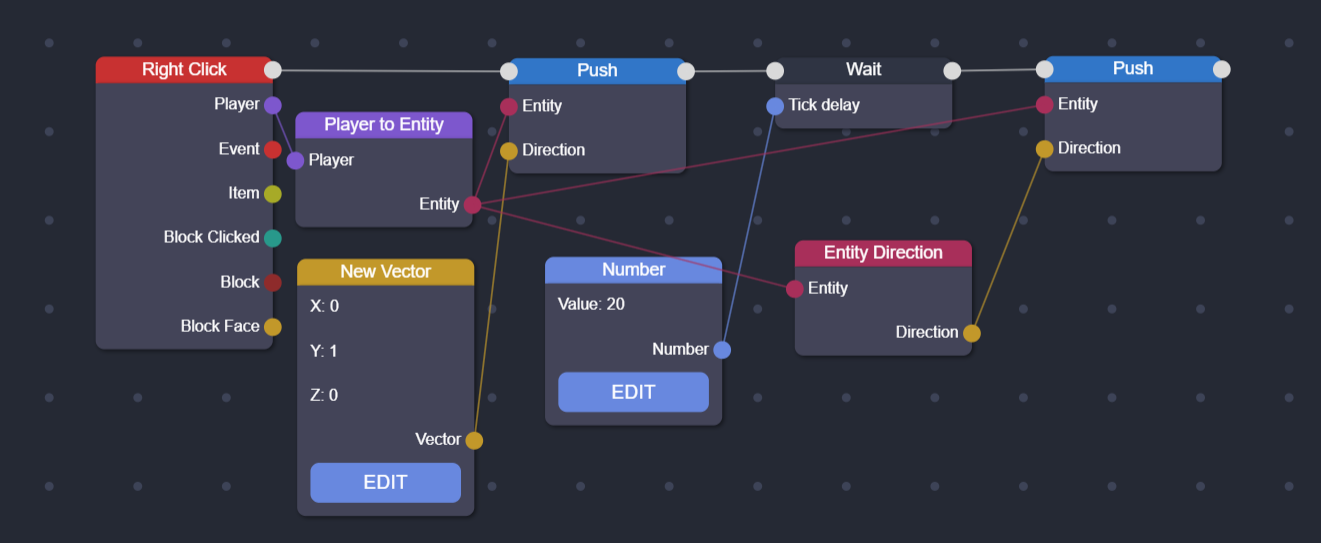
- Wait node: This node pauses the script for a specified number of ticks.
- Example 1: When the player interacts with an entity it is thrown into the air and after 30 ticks it is removed.
- Example 2: When the player makes right he is pushed up and after 20 ticks where he is pointing.
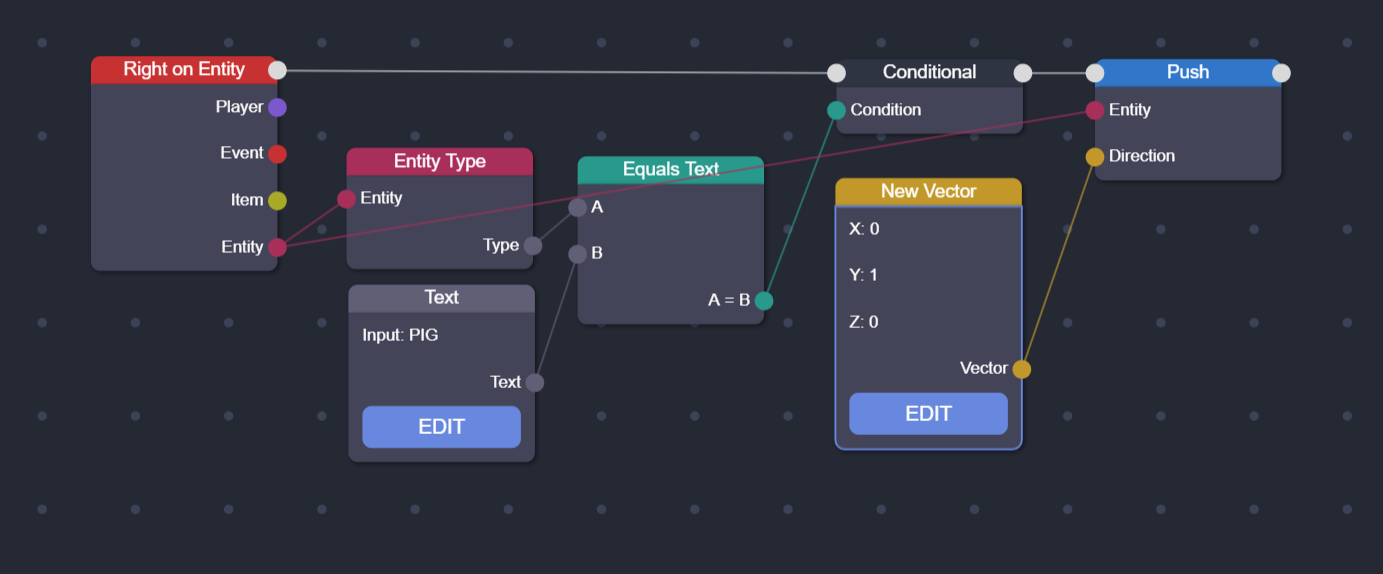
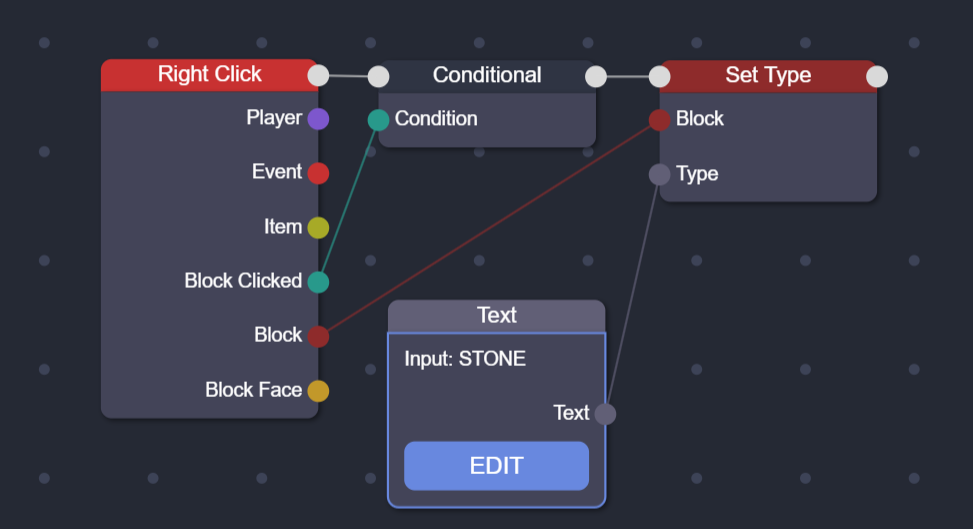
- Conditional node: This node checks a condition and only executes the following nodes if the condition is true.
- Example 1: When the player interacts with an entity he throws this one up only if it is a pig
- Example 2: When the player does right, if he is clicking on a block, then he turns the block into stone. (In this case the node is used to make sure that a block is clicked and not air)
Shortcuts
- a: Open the node menu
- t, n, v: Add text, number, or vector nodes
- +, -, =, *: Add math nodes
- w: Add a wait node
- ?: Add a conditional node
- D: Duplicate nodes
- Ctrl+C, Ctrl+V: Copy and paste nodes
- Ctrl+A: Select all nodes
- Ctrl+S: Save the script
- Delete: Delete selected nodes
- Shift + Click: Select multiple nodes
Other Topics
- Vectors: Learn how to use vectors for positions, directions, and more.
- Players: Work with player properties and actions.
- Entities: Interact with entities in the world.
- Properties: Get and set properties of various objects.
- Troubleshooting: Common issues and how to resolve them.
Conclusion
This guide has provided a basic overview of creating scripts in CrashPanel. By understanding nodes, pins, and listeners, you can create complex and interactive experiences for your players
Additional Tips
- Test frequently: Save your script often and test it to ensure it works as expected.
- Experiment: Don't be afraid to try new things and experiment with different node combinations.