Complete Guide to Creating Animated Blocks on CrashPanel
Introduction
This guide will walk you through the step-by-step process of creating custom, animated blocks for your Minecraft server using the CrashPanel.
Prerequisites
- CrashBlock: Make sure you have also installed the CrashBlock plugin, which is essential for creating custom blocks.
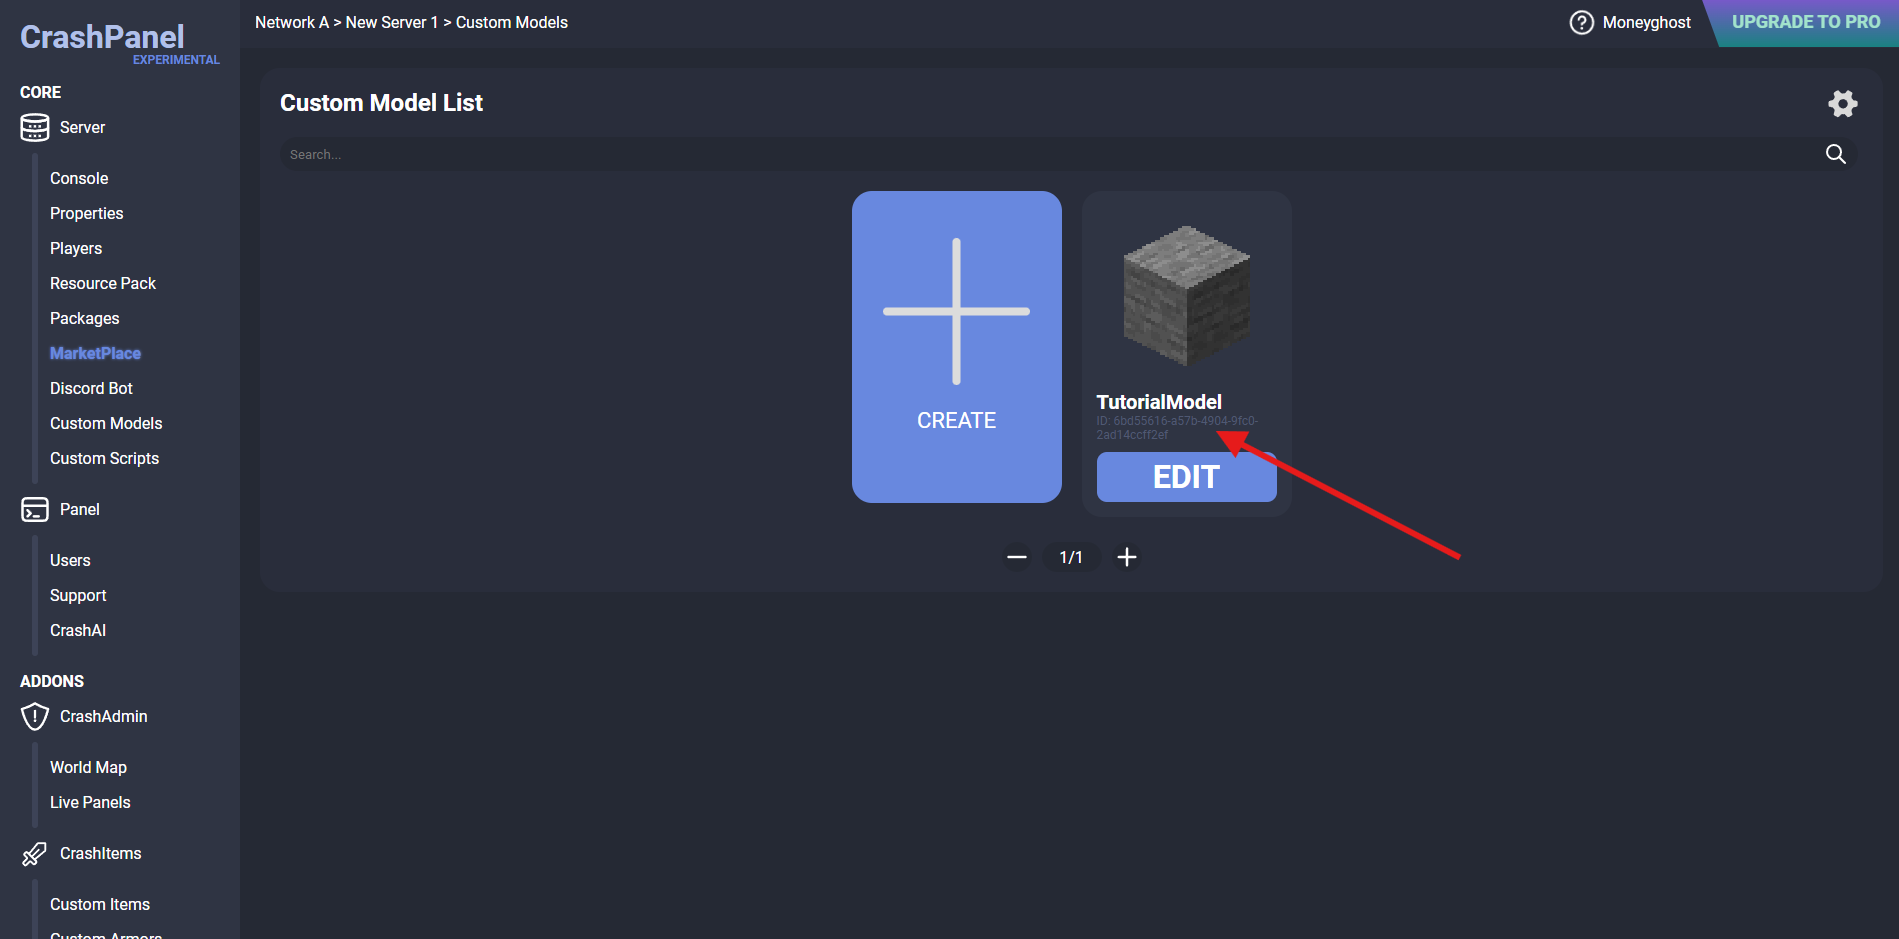
Creating a Custom Model
- Model Editor: Access the CrashPanel Model Editor. Here you will create the custom model of your block. See the dedicated guide.
- Defining poses: Define the different poses your model can take. Each pose will correspond to a different animation.
- Saving: Once you have completed the model, save it and remember the assigned UUID. This ID will be crucial for linking the model to your block.
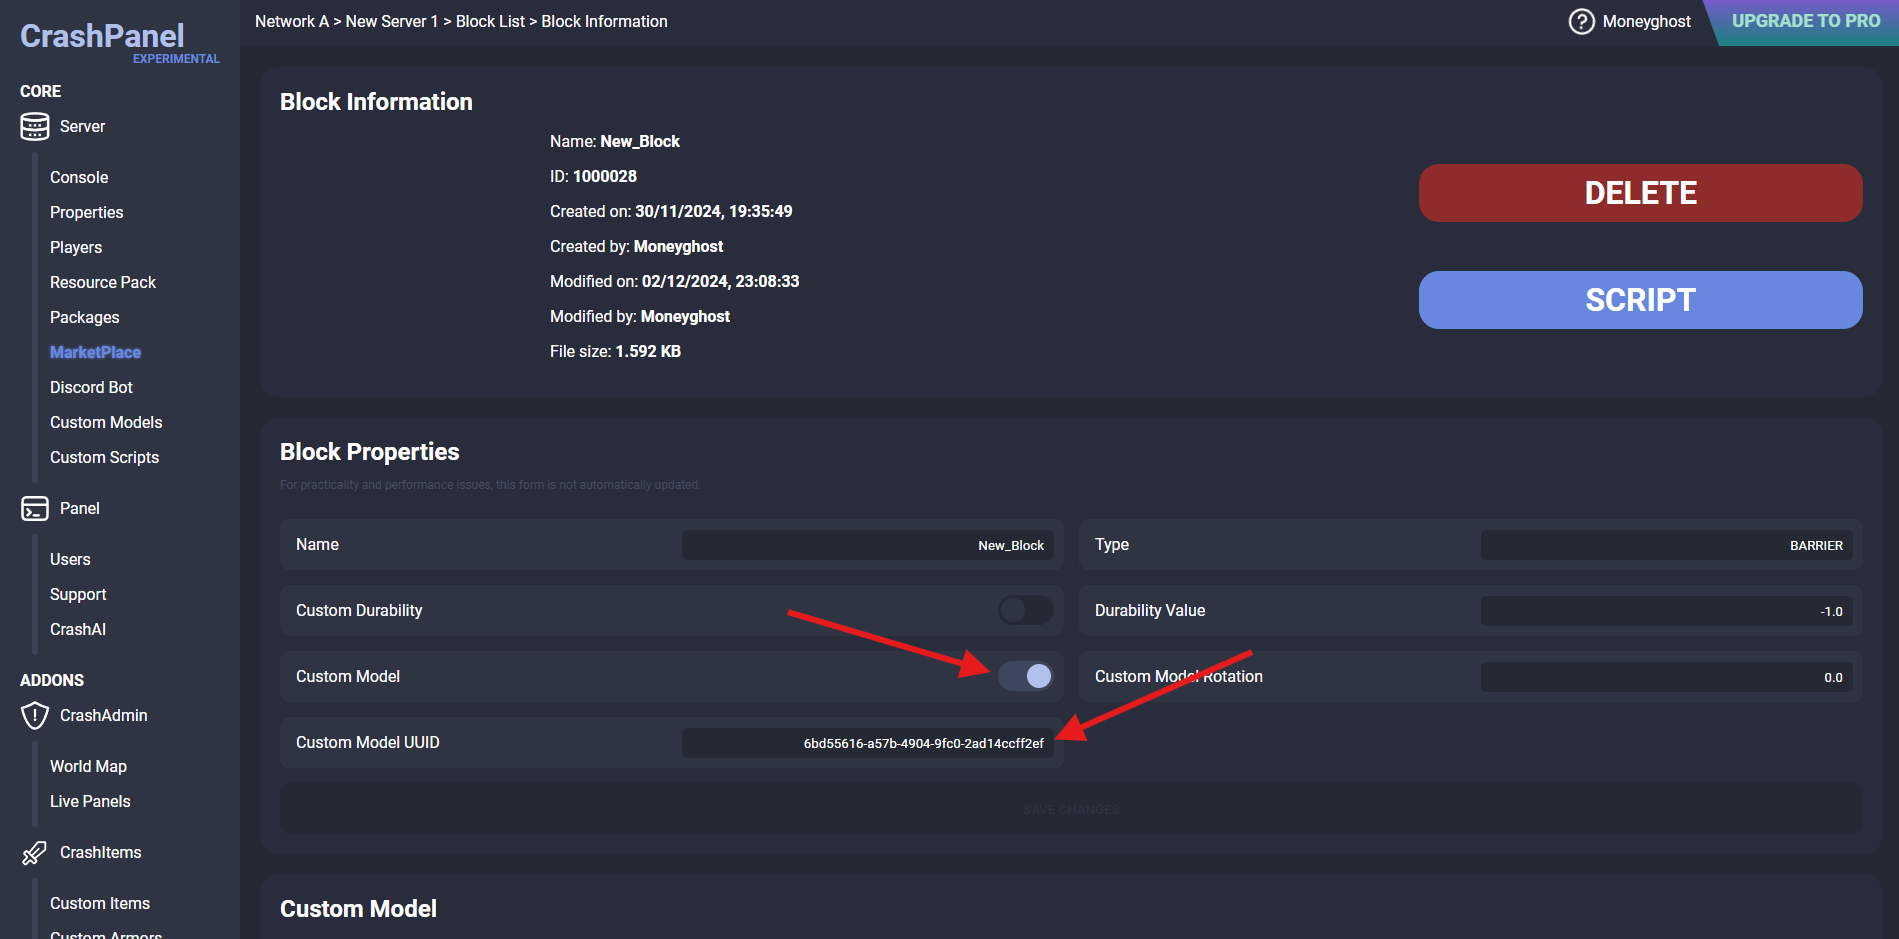
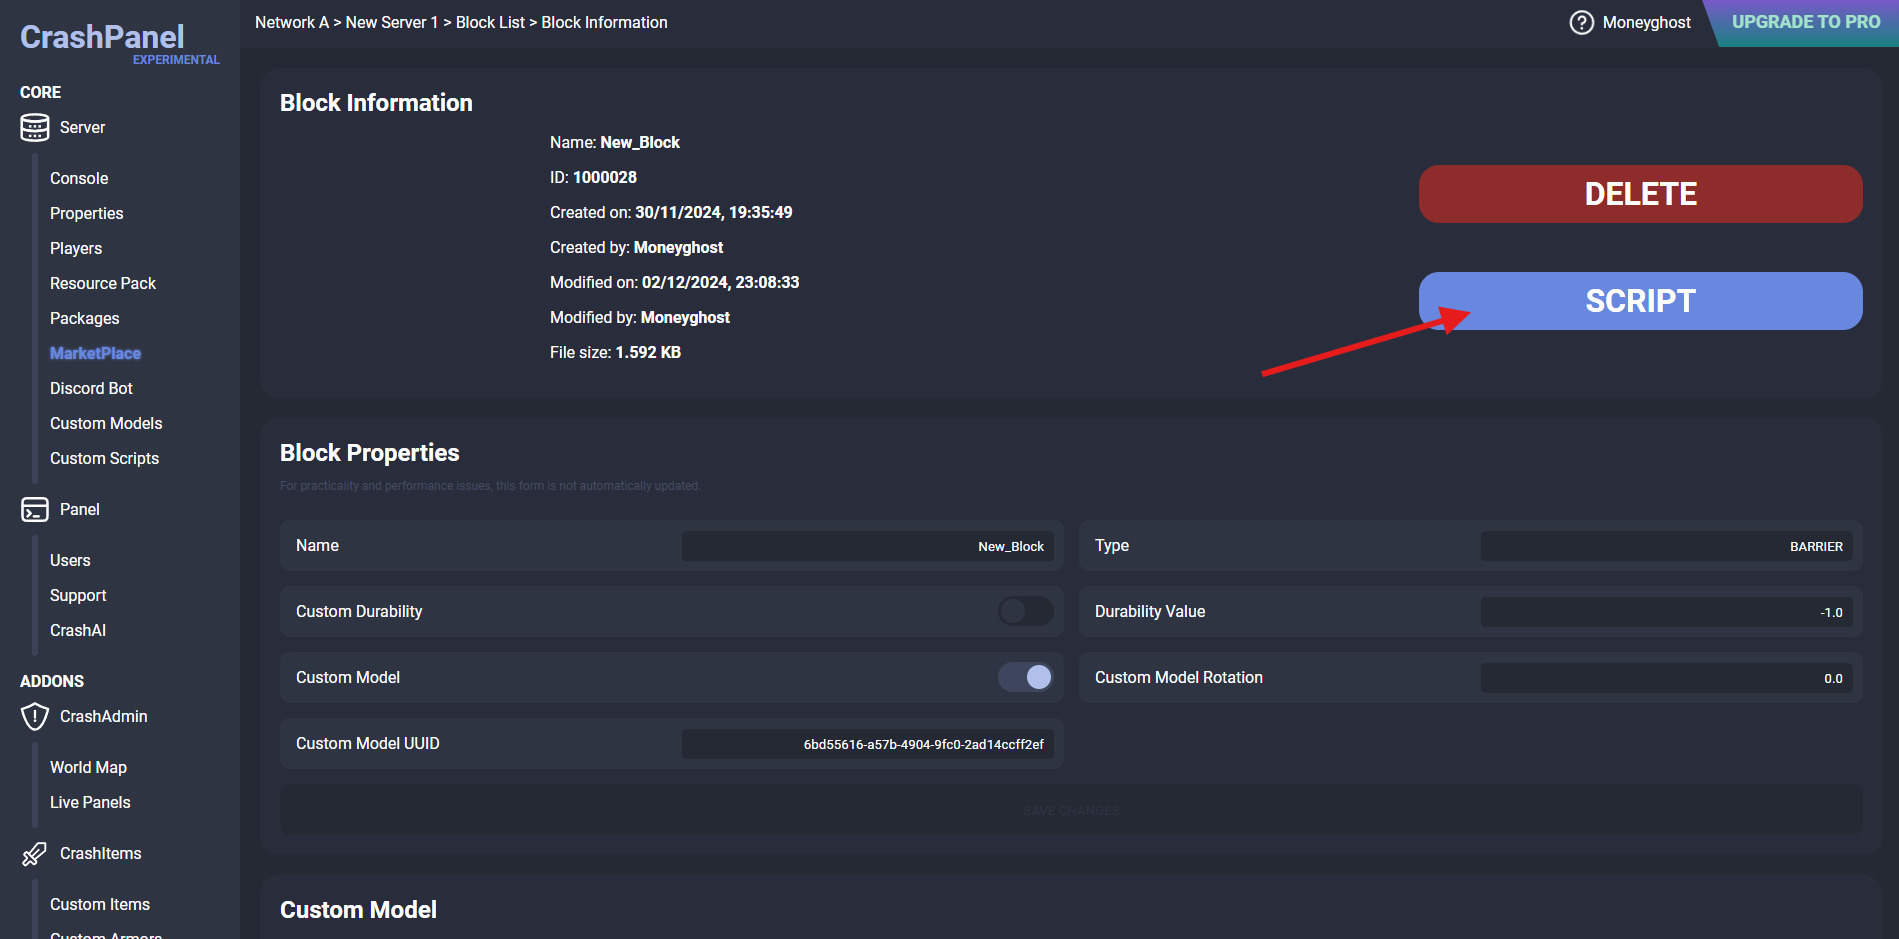
Creating a Custom Block
- Access: In the CrashPanel dashboard, go to the Custom Blocks section.
- New block: Click CREATE to create a new custom block.
- Block properties:
- Custom Model: Enable this option and enter the ID of the previously created model in the Custom Model UUID field.
- Saving: Save your changes.
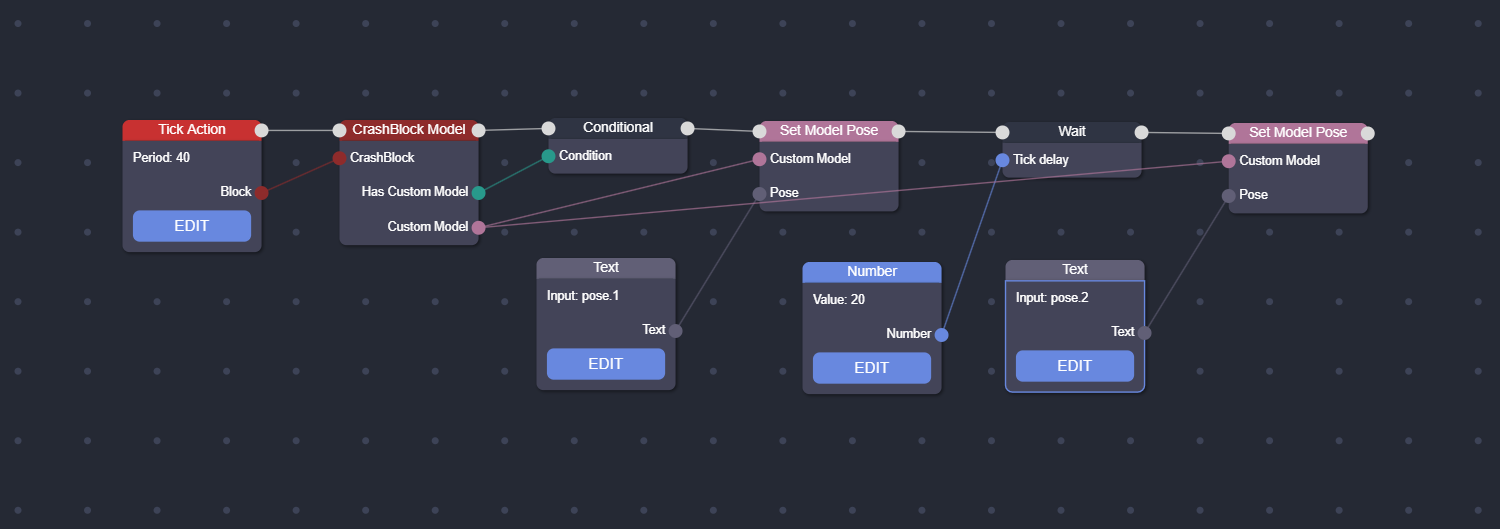
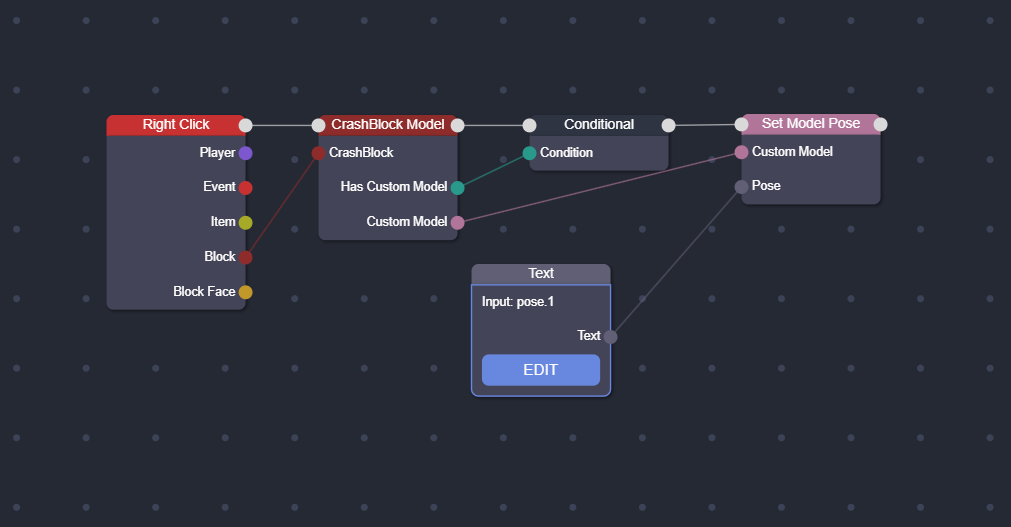
Animating the Block
- Script Editor: Access the Script Editor associated with your block.
- Writing the script: Use nodes to define the animations.
- CrashBlock Model node: This node allows you to access the Custom Model.
- Set Model Pose node: This node allows you to set a specific pose for the model.
- Script examples:
- Periodic pose change
- Pose change on interaction
Obtaining the Block in-game
- Command: Use the command /crashblock (or /cb) to obtain your custom block in the game world.
Tips
- Item Custom: Change the item used to place the block. See the dedicated guide [INCOMPLETE].
- Custom Model Module [complex]:
- Use the Custom Model Module of the Custom Block to set a model to the item.
- Remember to use the ID of the Custom Block in the Model Editor to avoid duplicate files.