Creating Custom Armor in CrashPanel: A Comprehensive Guide
Custom Armor requires CrashItems
Introduction
CrashPanel offers a versatile system for creating custom armors in Minecraft. This guide will walk you through the step-by-step process of creating a unique armor, from texture to animation.
Creating the Base: The Custom Item
- Create a New Custom Item:
- Select the "leather armor" type as the base for your custom armor.
- Customize the name and description of your item. For more information see the dedicated guide.
- Important: The texture you upload at this stage will determine the appearance of the item in your inventory or when you hold it in your hand.

Defining the Worn Appearance: The Custom Armor
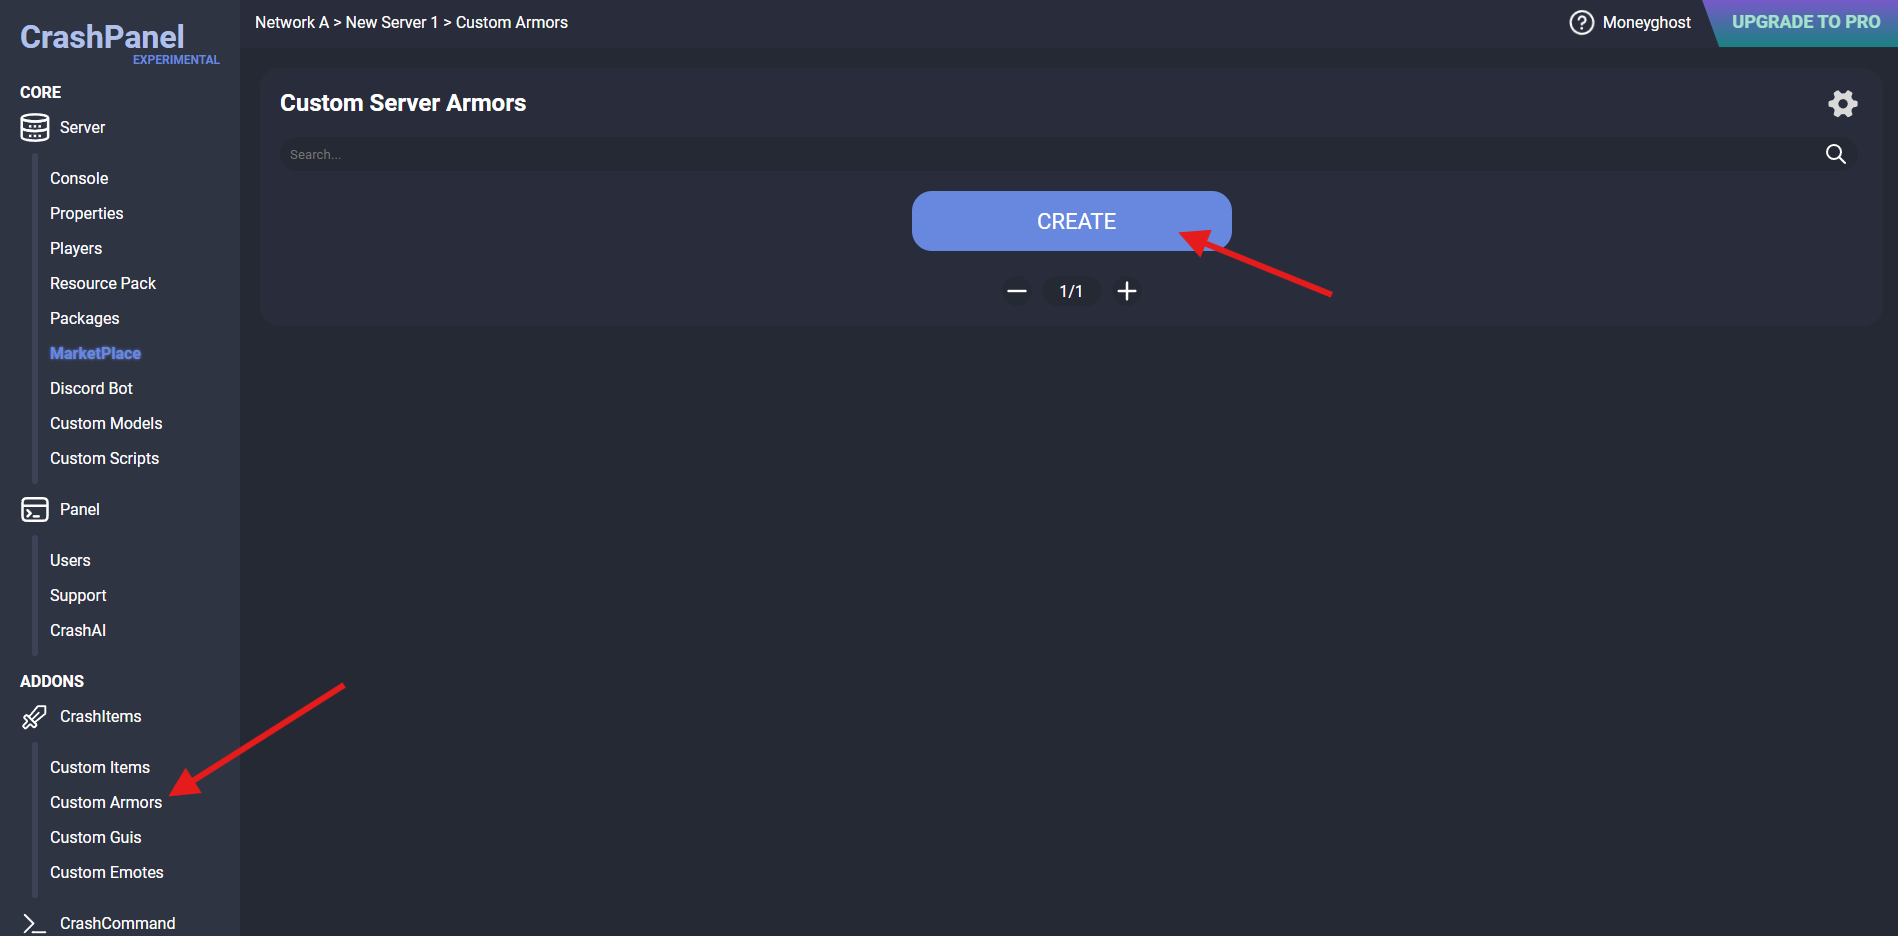
- Create a New Custom Armor:
- Access the "Custom Armors" section.
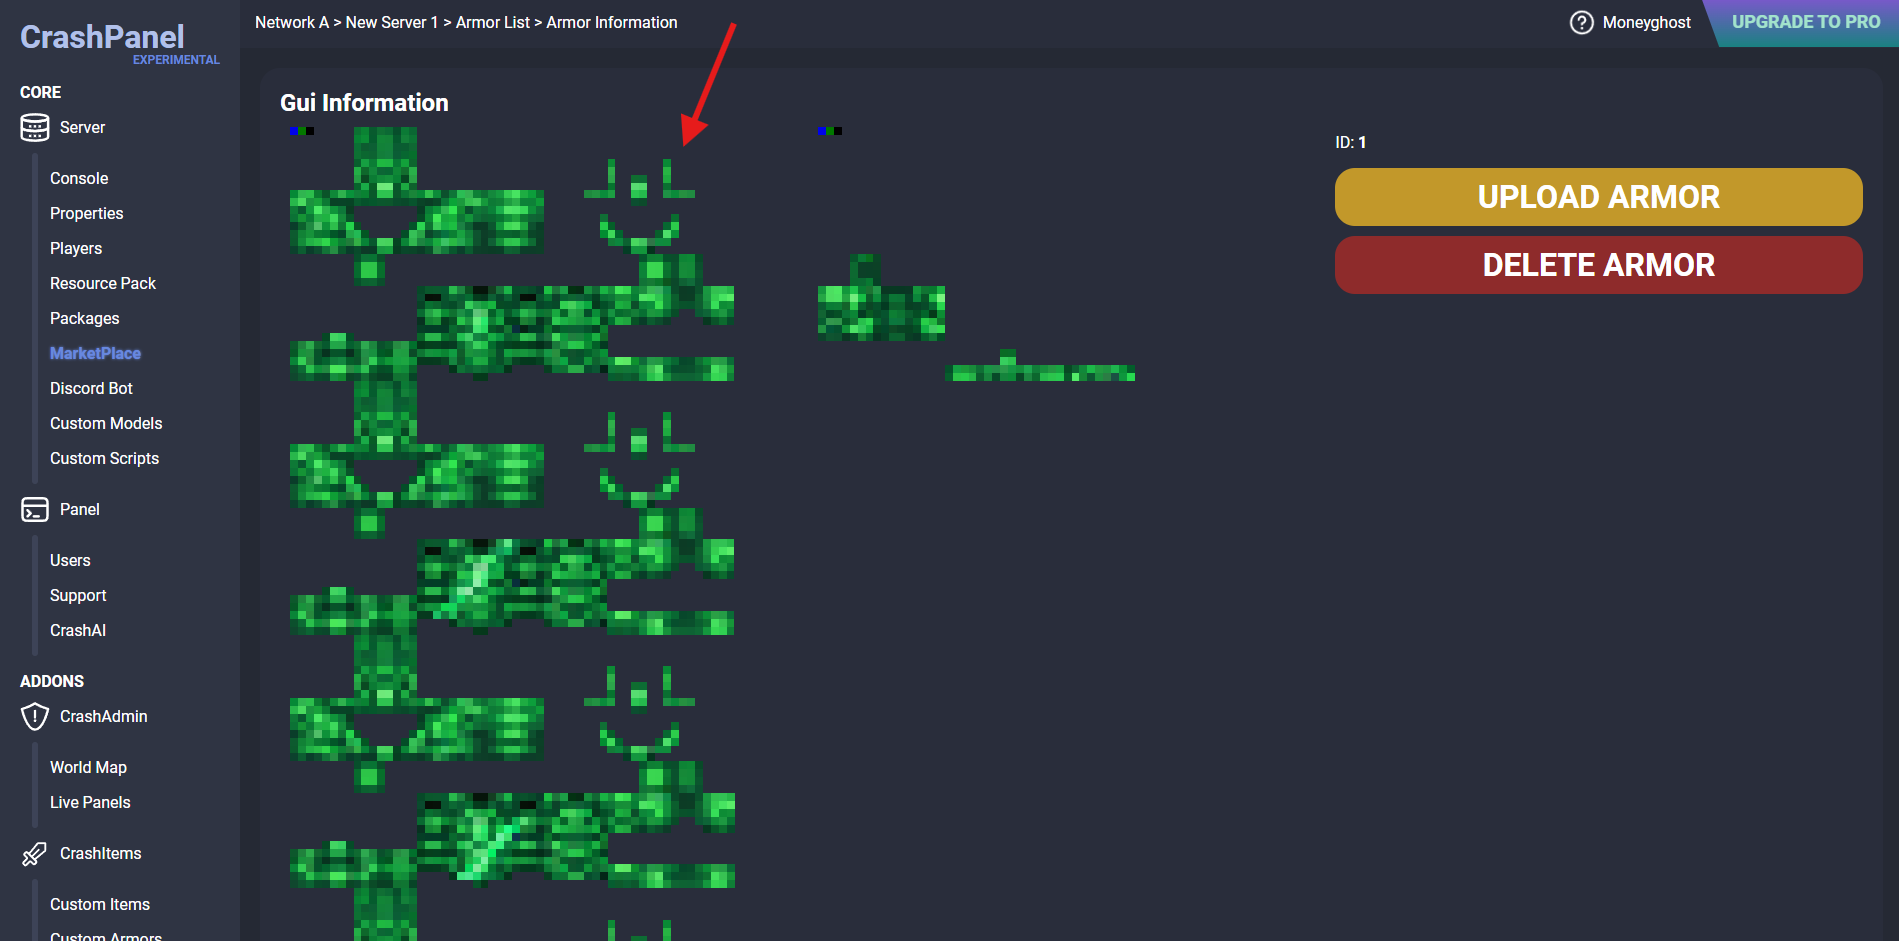
- Upload the textures.
- Texture Format: Ensure that the textures are in the correct format, like these:
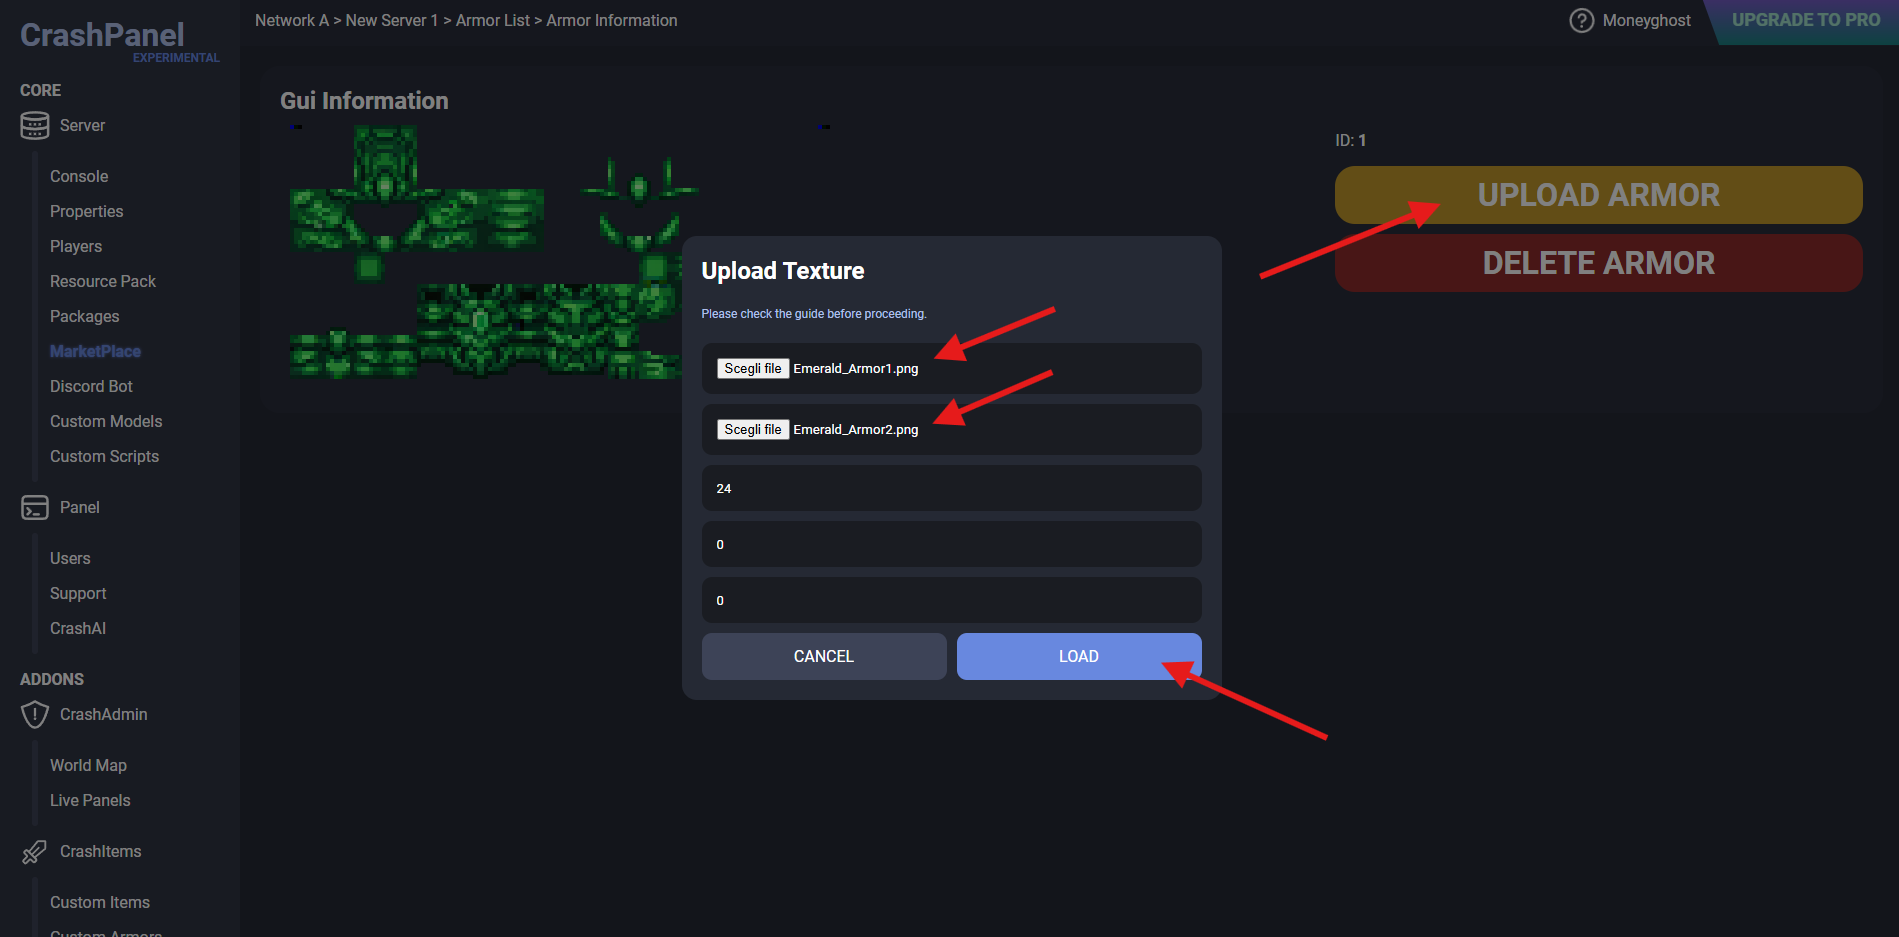


- Configure Settings:
- Animation Speed: Adjust the animation speed of the armor. Experiment with values between 0 and 255 to achieve the desired effect. (default: 24)
- Animation Interpolation: This setting influences the smoothness of the animation. (Values: 0, 1. Default: 0)
- Emissivity: Determines the light emission of the armor. (Values: 0-255. Default: 0)
Linking Custom Item and Custom Armor
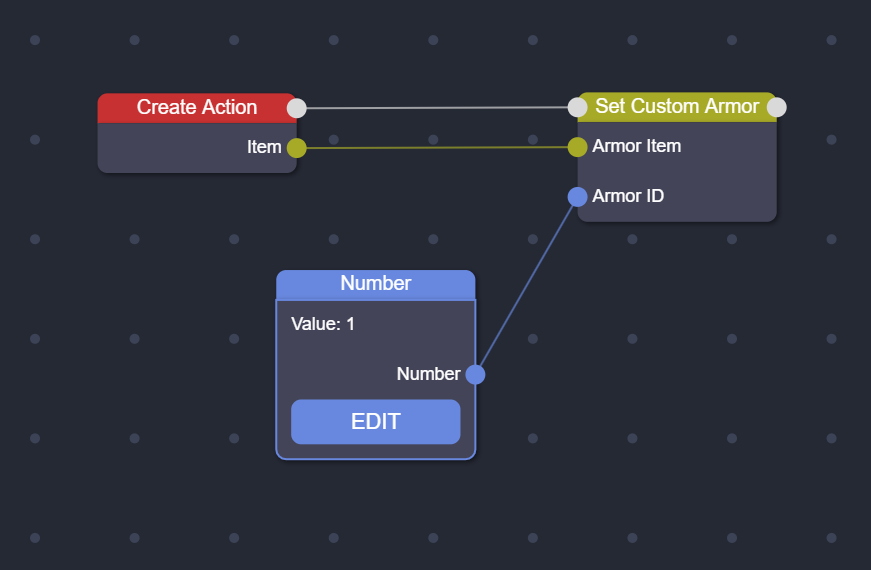
- Open the Script Editor of the Custom Item:
- Use the "Set Custom Armor" node.
- Set the ID of the Custom Armor you just created.
- This node will ensure that when you wear the Custom Item, the corresponding Custom Armor is displayed.
Loading and Testing
- Reload the Resource Pack:
- In Minecraft, execute the command /reloadresourcepack to apply the changes.
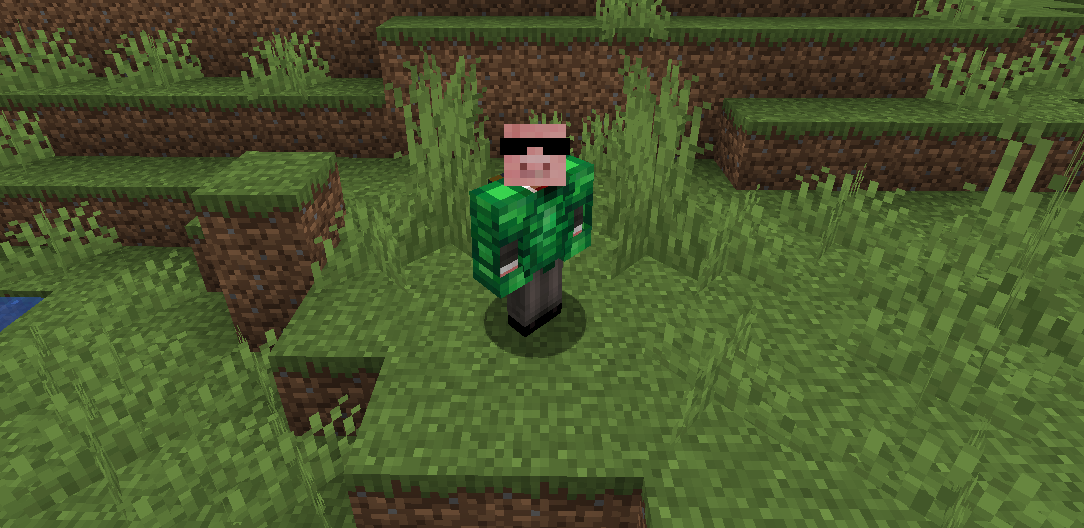
- Wear the Armor:
- Equip the created Custom Item. The armor should appear with customized textures and animations.
Animated Custom Armor
- To animate a Custom Armor, in the texture, place vertically, one after the other, all the frames, keeping the format 64px wide and a multiple of 32px high.
- Here is an example of an animated texture: (128px height, so formed by 4 frames)
- On Minecraft, you will see this: (using an 'Animation Speed' of 120)

Advanced Customizations
- Custom Models: For even more unique armor, you can create a new Custom Item with a custom 3D model and replace the leather helmet with this new item using a script.
- Special Effects: Explore the possibilities offered by CrashPanel to add visual or sound effects to your armor.