Creating Custom Items in CrashPanel
Introduction
This guide will walk you through the process of creating custom items in CrashPanel. Custom items allow you to add unique items to your Minecraft server with specific properties, texture, and behaviors.
Getting Started
-
Navigate to the Custom Items Page:
- Log in to your CrashPanel dashboard.
- Select the server where you want to create the custom item.
- On the left-hand side, click "Custom Items."
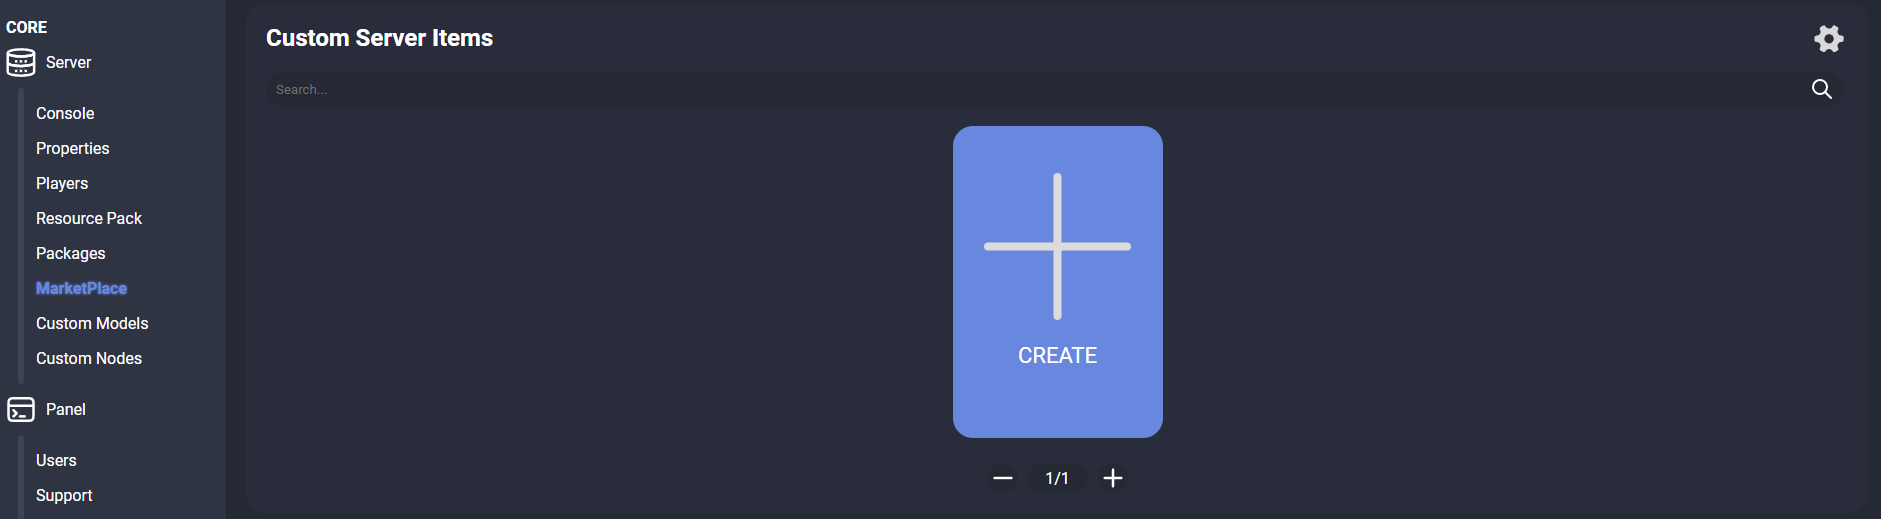
You can change the layout of the list by clicking the gear in the upper right corner.
-
Create a New Custom Item:
- In the "Custom Server Items" module, click the "Create" button.
Configuring Your Custom Item
Item Properties
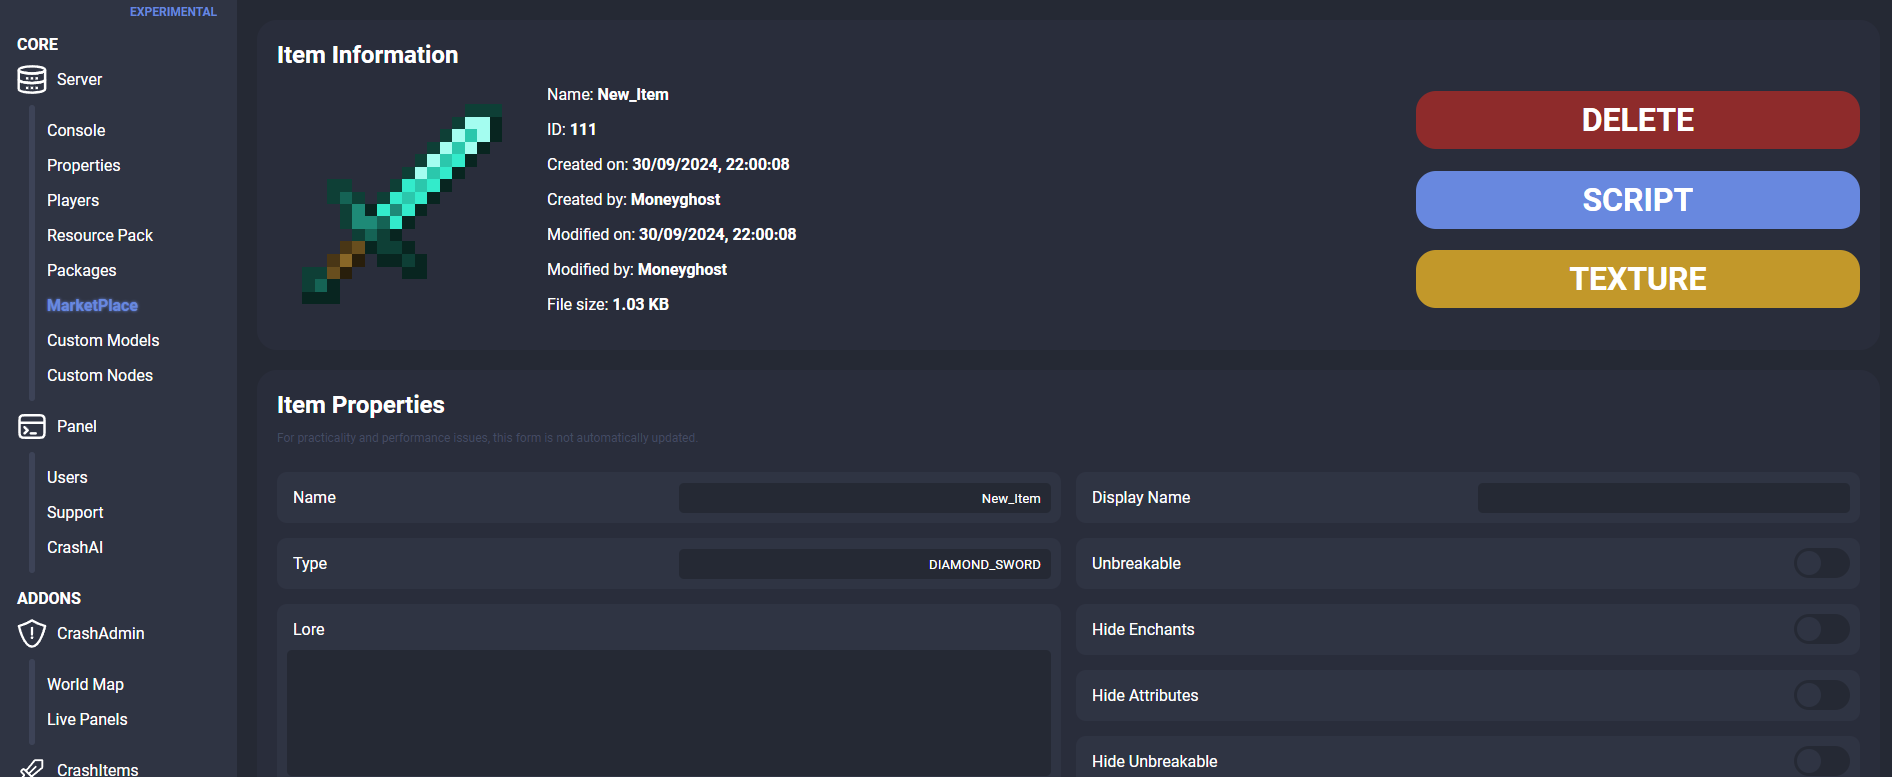
The "Item Properties" module allows you to set many properties. Here are some of them:
- Name: Assign a unique name to your item. This name will be used to identify it in the system.
- Display Name: This is the name that will appear in the game. You can customize it to make it more appealing.
- Enchantments:
- Add enchantments using the format "enchantmentID=level" (e.g., sharpness=2).
- Each enchantment must be on a separate line.
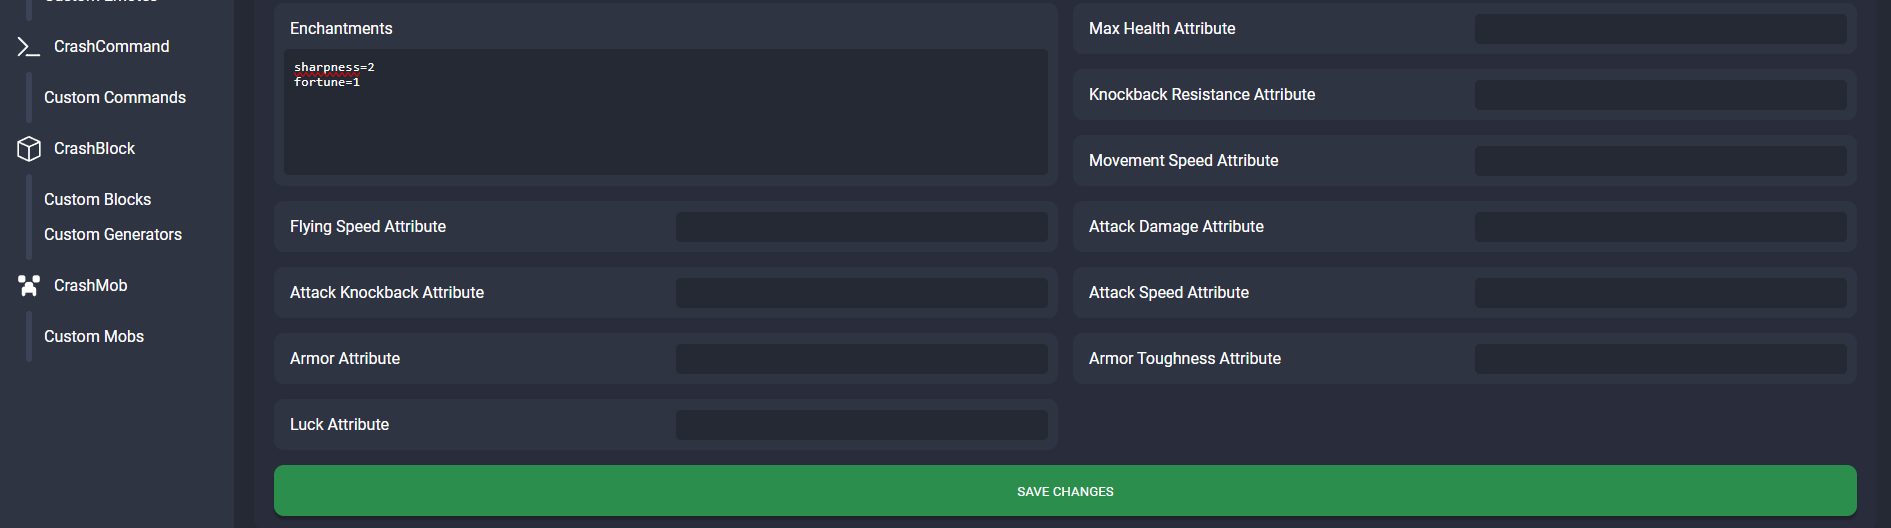 Remember to save the properties by clicking the green "SAVE CHANGES" button.
Item Model
There are 3 types of models you can choose from:
- Default: Uses a default model for simple items like paper. You can only upload one texture.
- Tool: Used for items like swords, pickaxes, etc. (Only changes the handle from "Default")
- Custom: Gives you maximum control over model creation. You can upload custom .json models and textures.
Uploading Textures:
- For the “Default” and “Tool” models, you just need to click the "TEXTURE" button in the "Item Information" module and then select the model and load the texture.
- For the custom model, on the other hand, there are 2 steps:
- Click the "TEXTURE" button and select "Custom Model" without loading any textures.
- Go to the "Custom Model" module at the bottom of the page and upload the model and texture. You can drag the files over the module.
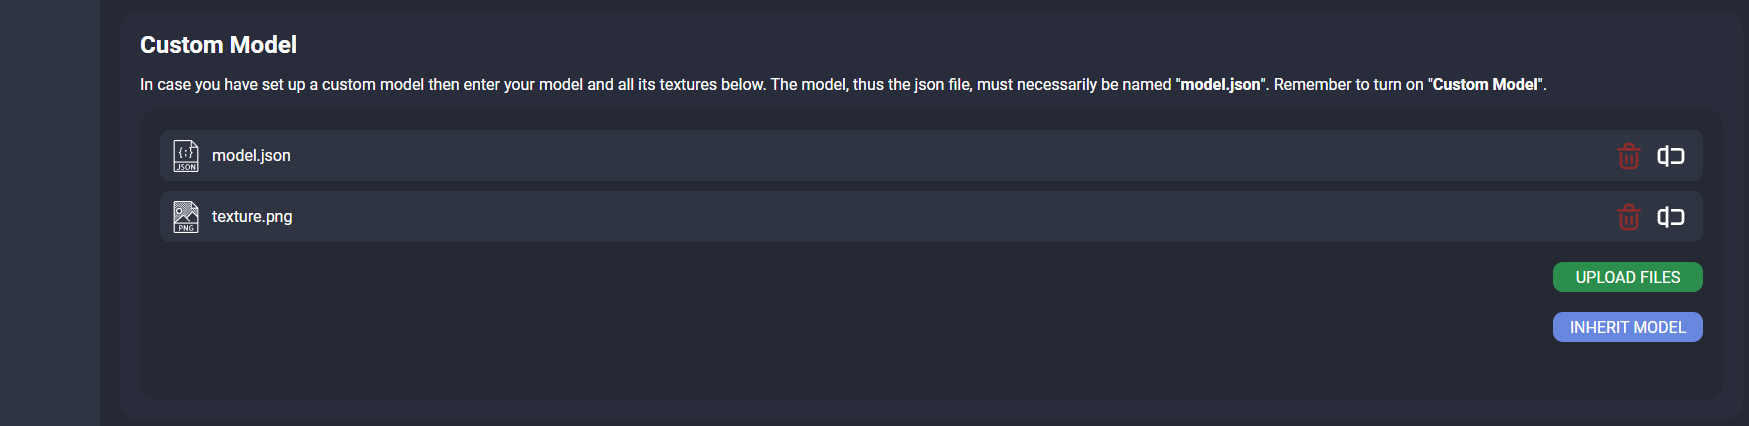
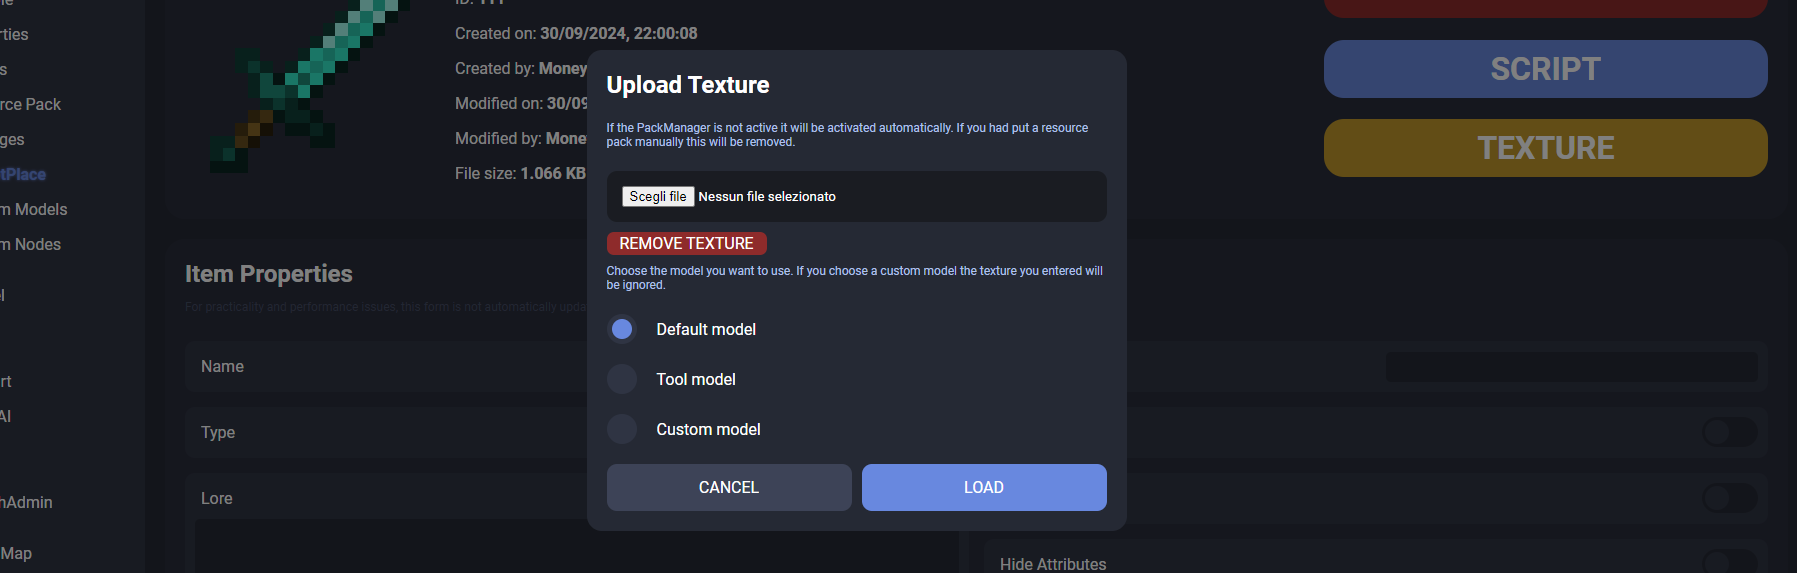
You can remove the model and texture by clicking the "TEXTURE" button and then "REMOVE TEXTURE"
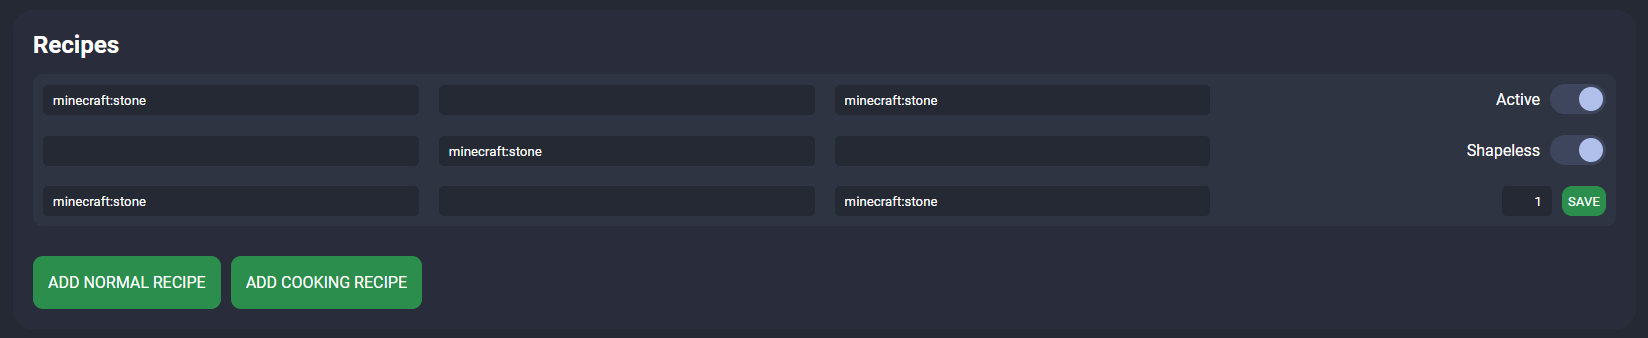
Crafting Recipes
Defining Recipes:- In the "Recipes" module, configure how players can craft your item.
- See the dedicated guide.
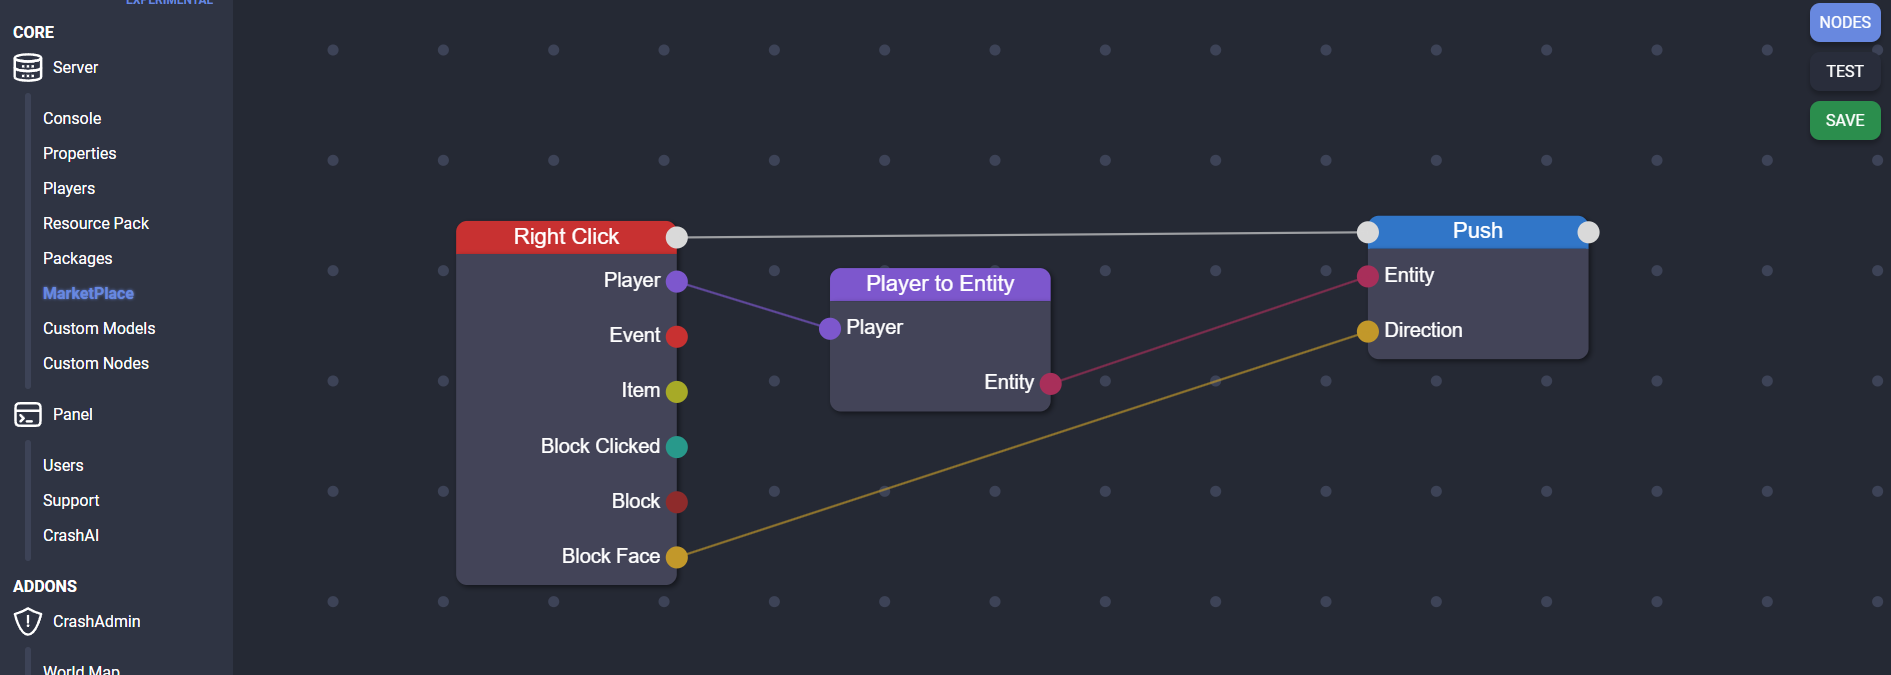
Scripting
- Access the script editor by clicking the "SCRIPT" button.
- See the dedicated guide on the Script Editor.
- Examples of actions:
- Execute commands when a player uses the item.
- Modify the player's inventory.
- Create visual or sound effects.
- Listeners: Use listeners to react to specific events, such as right-clicking, using on a block, etc.
- Note: Scripting offers endless possibilities for customizing your item.
- IMPORTANT: The "Tick Action" listener may cause lag if used incorrectly.
Item Base
The base of a Custom Item is the NBT that the item will have when it is created. Useful if you want to modify items from other plugins.
- Use the command /ci <id or name> setbase to set an existing item as the base for your custom item. (Make sure you have in your main hand the item to take the NBT from)
- Example: You can create a custom item starting from a shulker box filled with items.
Using the Custom Item
- Use the command /ci to open a graphical interface and select the item.
- Or, use the command /ci <id or name> to obtain the item directly.