Particle Editor
Creating a Custom Particle
From your server's CrashPanel, click Custom Particles (in the Content & Script section) and then click CREATE to create a new Custom Particle.
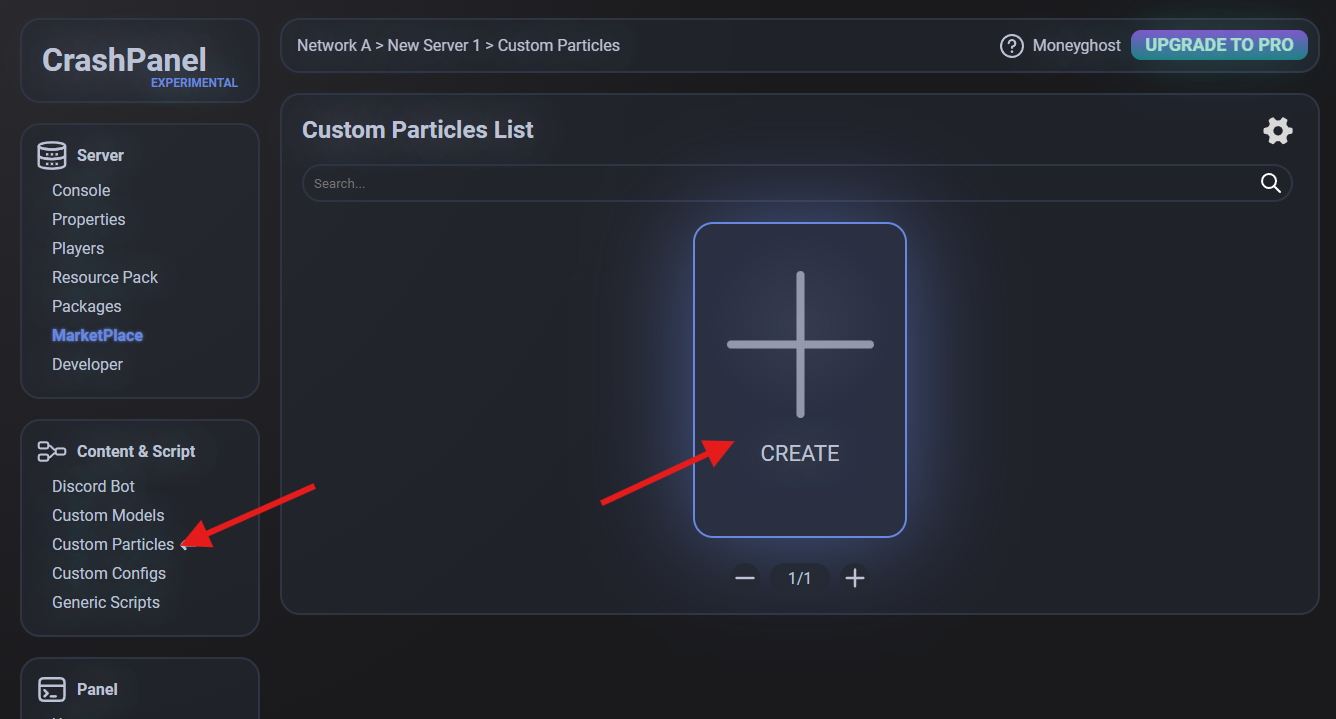
Remember to change the name of the Custom Particle immediately so that it is easily identifiable.
Understanding the Particle Editor
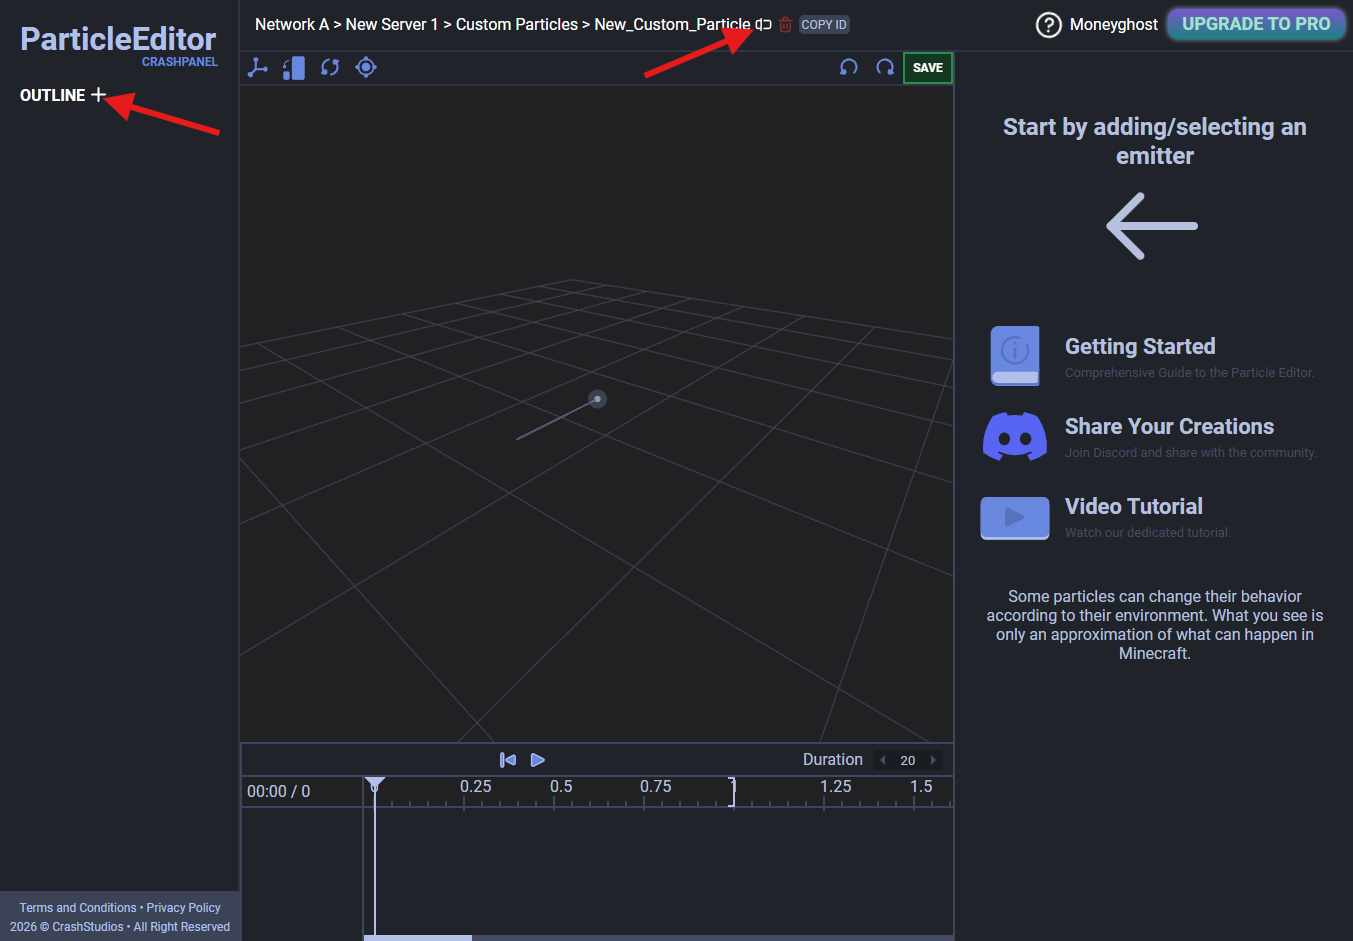
On the left, you will find the outline, i.e., all your emitters, and on the right, you will find the properties of the selected emitter.
There are four sections on the right:
- BASE: emitter type, particle, emission, and placement
- MOTION: emitter transformation (position, rotation, etc.)
- EXPORT: particle rendering and import/export to JSON files (useful for sharing your Custom Particle)
- PRESETS: a series of ready-to-use particle presets
To add an emitter, click the + button next to the OUTLINE label on the left.
Animating a Custom Particle
Unlike the Model Editor, the Particle Editor only supports one animation per Custom Particle. To animate, simply interact with the timeline and modify your emitters (by clicking the button next to the individual property to create a keyframe or by interacting with the viewport).
Spawning a Custom Particle
There are two ways to spawn a Custom Particle:
- via command with /customparticles spawn <id or name> [duration in ticks] or with /customparticles eyespawn <id or name> [duration in ticks] to spawn it in the player's head.
- via nodes in the script (Attach Custom Particles, Spawn Custom Particles, etc.)